
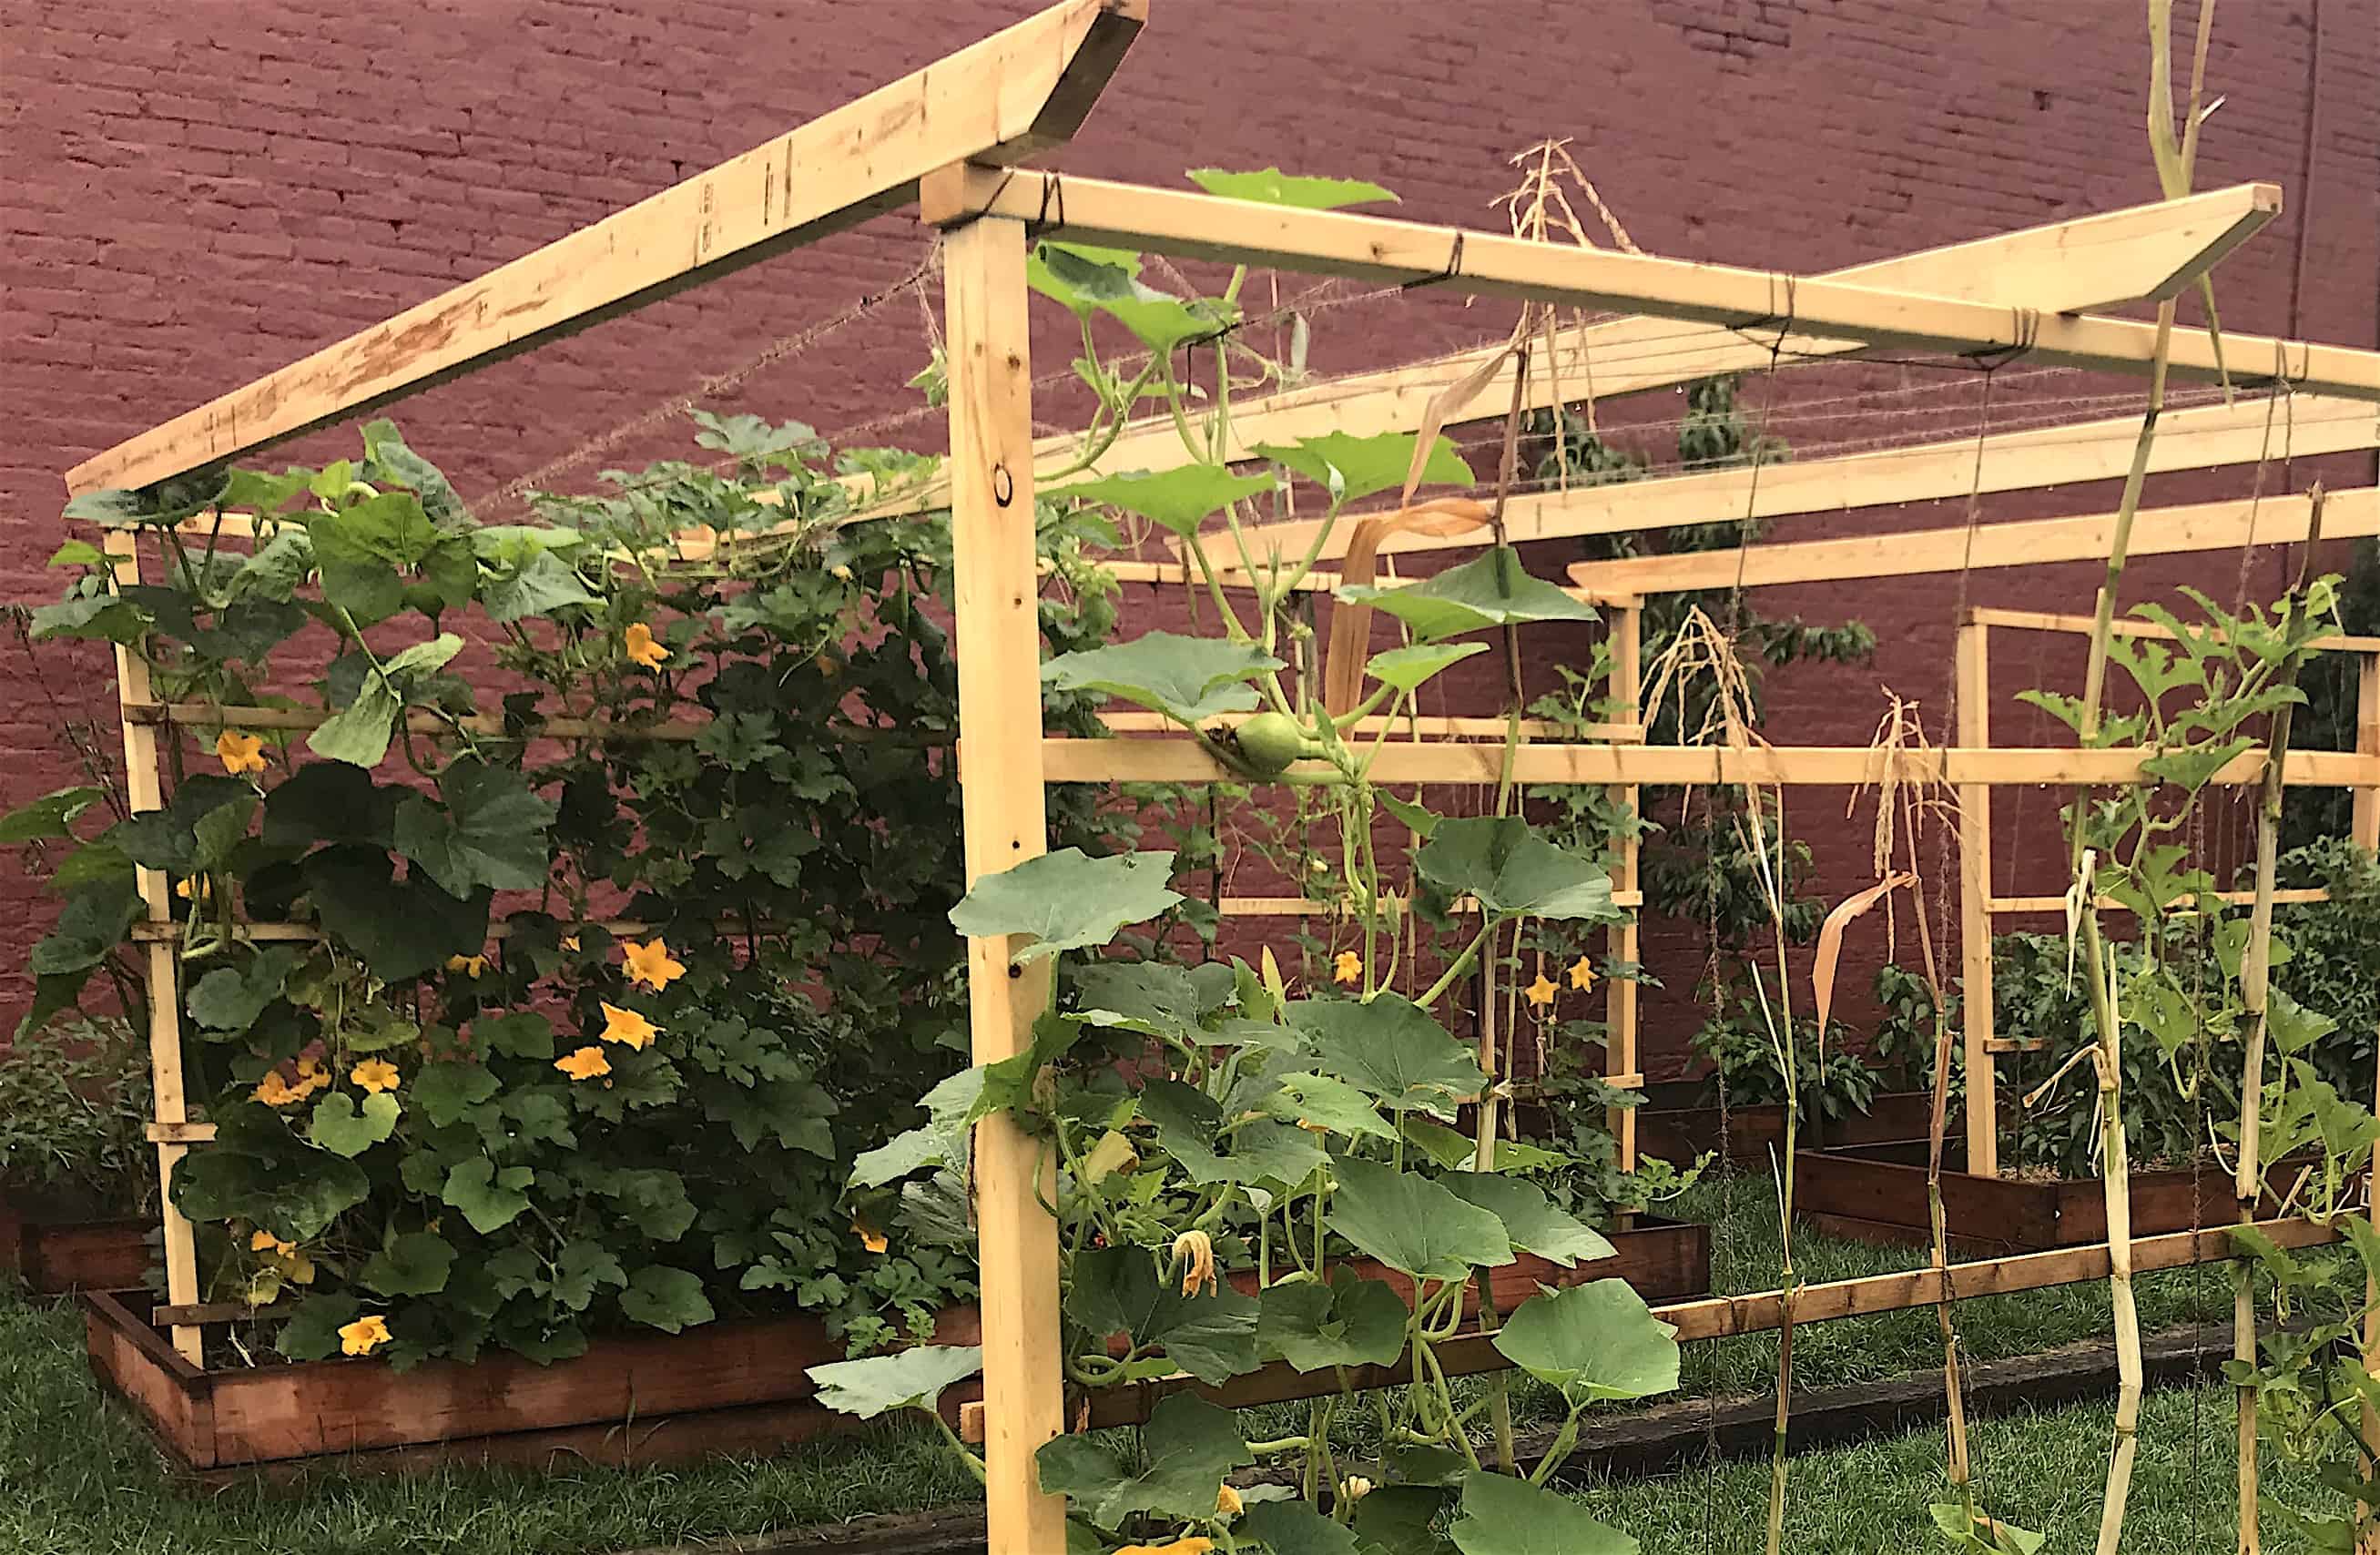
One of my FAVORITE things about my garden this year is how we trellised the raised bed gardens. Not only is it a great visual, it is very practical and easy to install. We’re going to talk about why trellis systems are a great idea and walk you through how to build one using an existing raised bed as a starting point. Here are a few reasons why you should definitely consider adding a trellis to next years garden plan!
How to Trellis Your Raised Bed Garden:
Benefits of Trellis Gardening
- Increases air flow and cuts down on issues with detrimental fungi
- Saves space – Instead of taking over your yard, you can help your indeterminate plants grow up instead of out!
- Allows you to spot trouble early – If you’ve ever battled with slugs, cutworms, or other garden pests, lifting the vines off the ground allows you to see what is going on down there and take appropriate action ASAP
- It is easier to harvest when your fruit is off the ground instead of having to root around underfoot; possibly damaging veggie babies you can’t easily see
- It looks REALLY COOL!!
What You Can Trellis
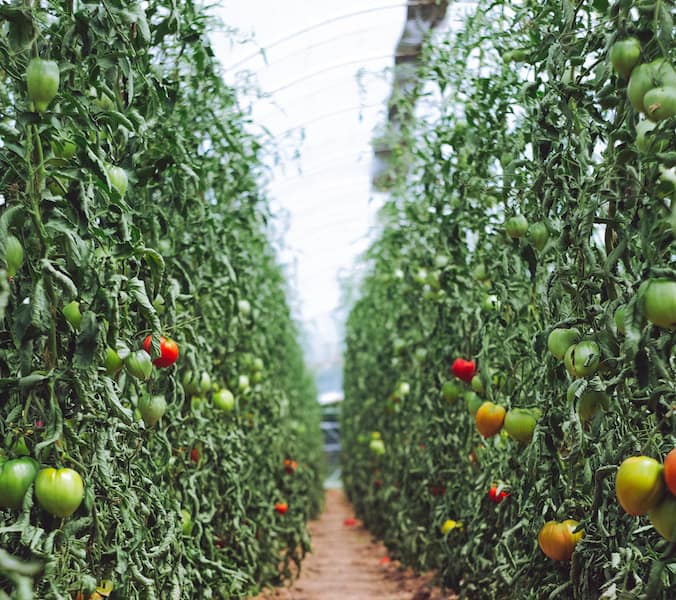
- Tomatoes
- Beans and Peas
- Summer and Winter Squash
- Melons
- Cucumbers
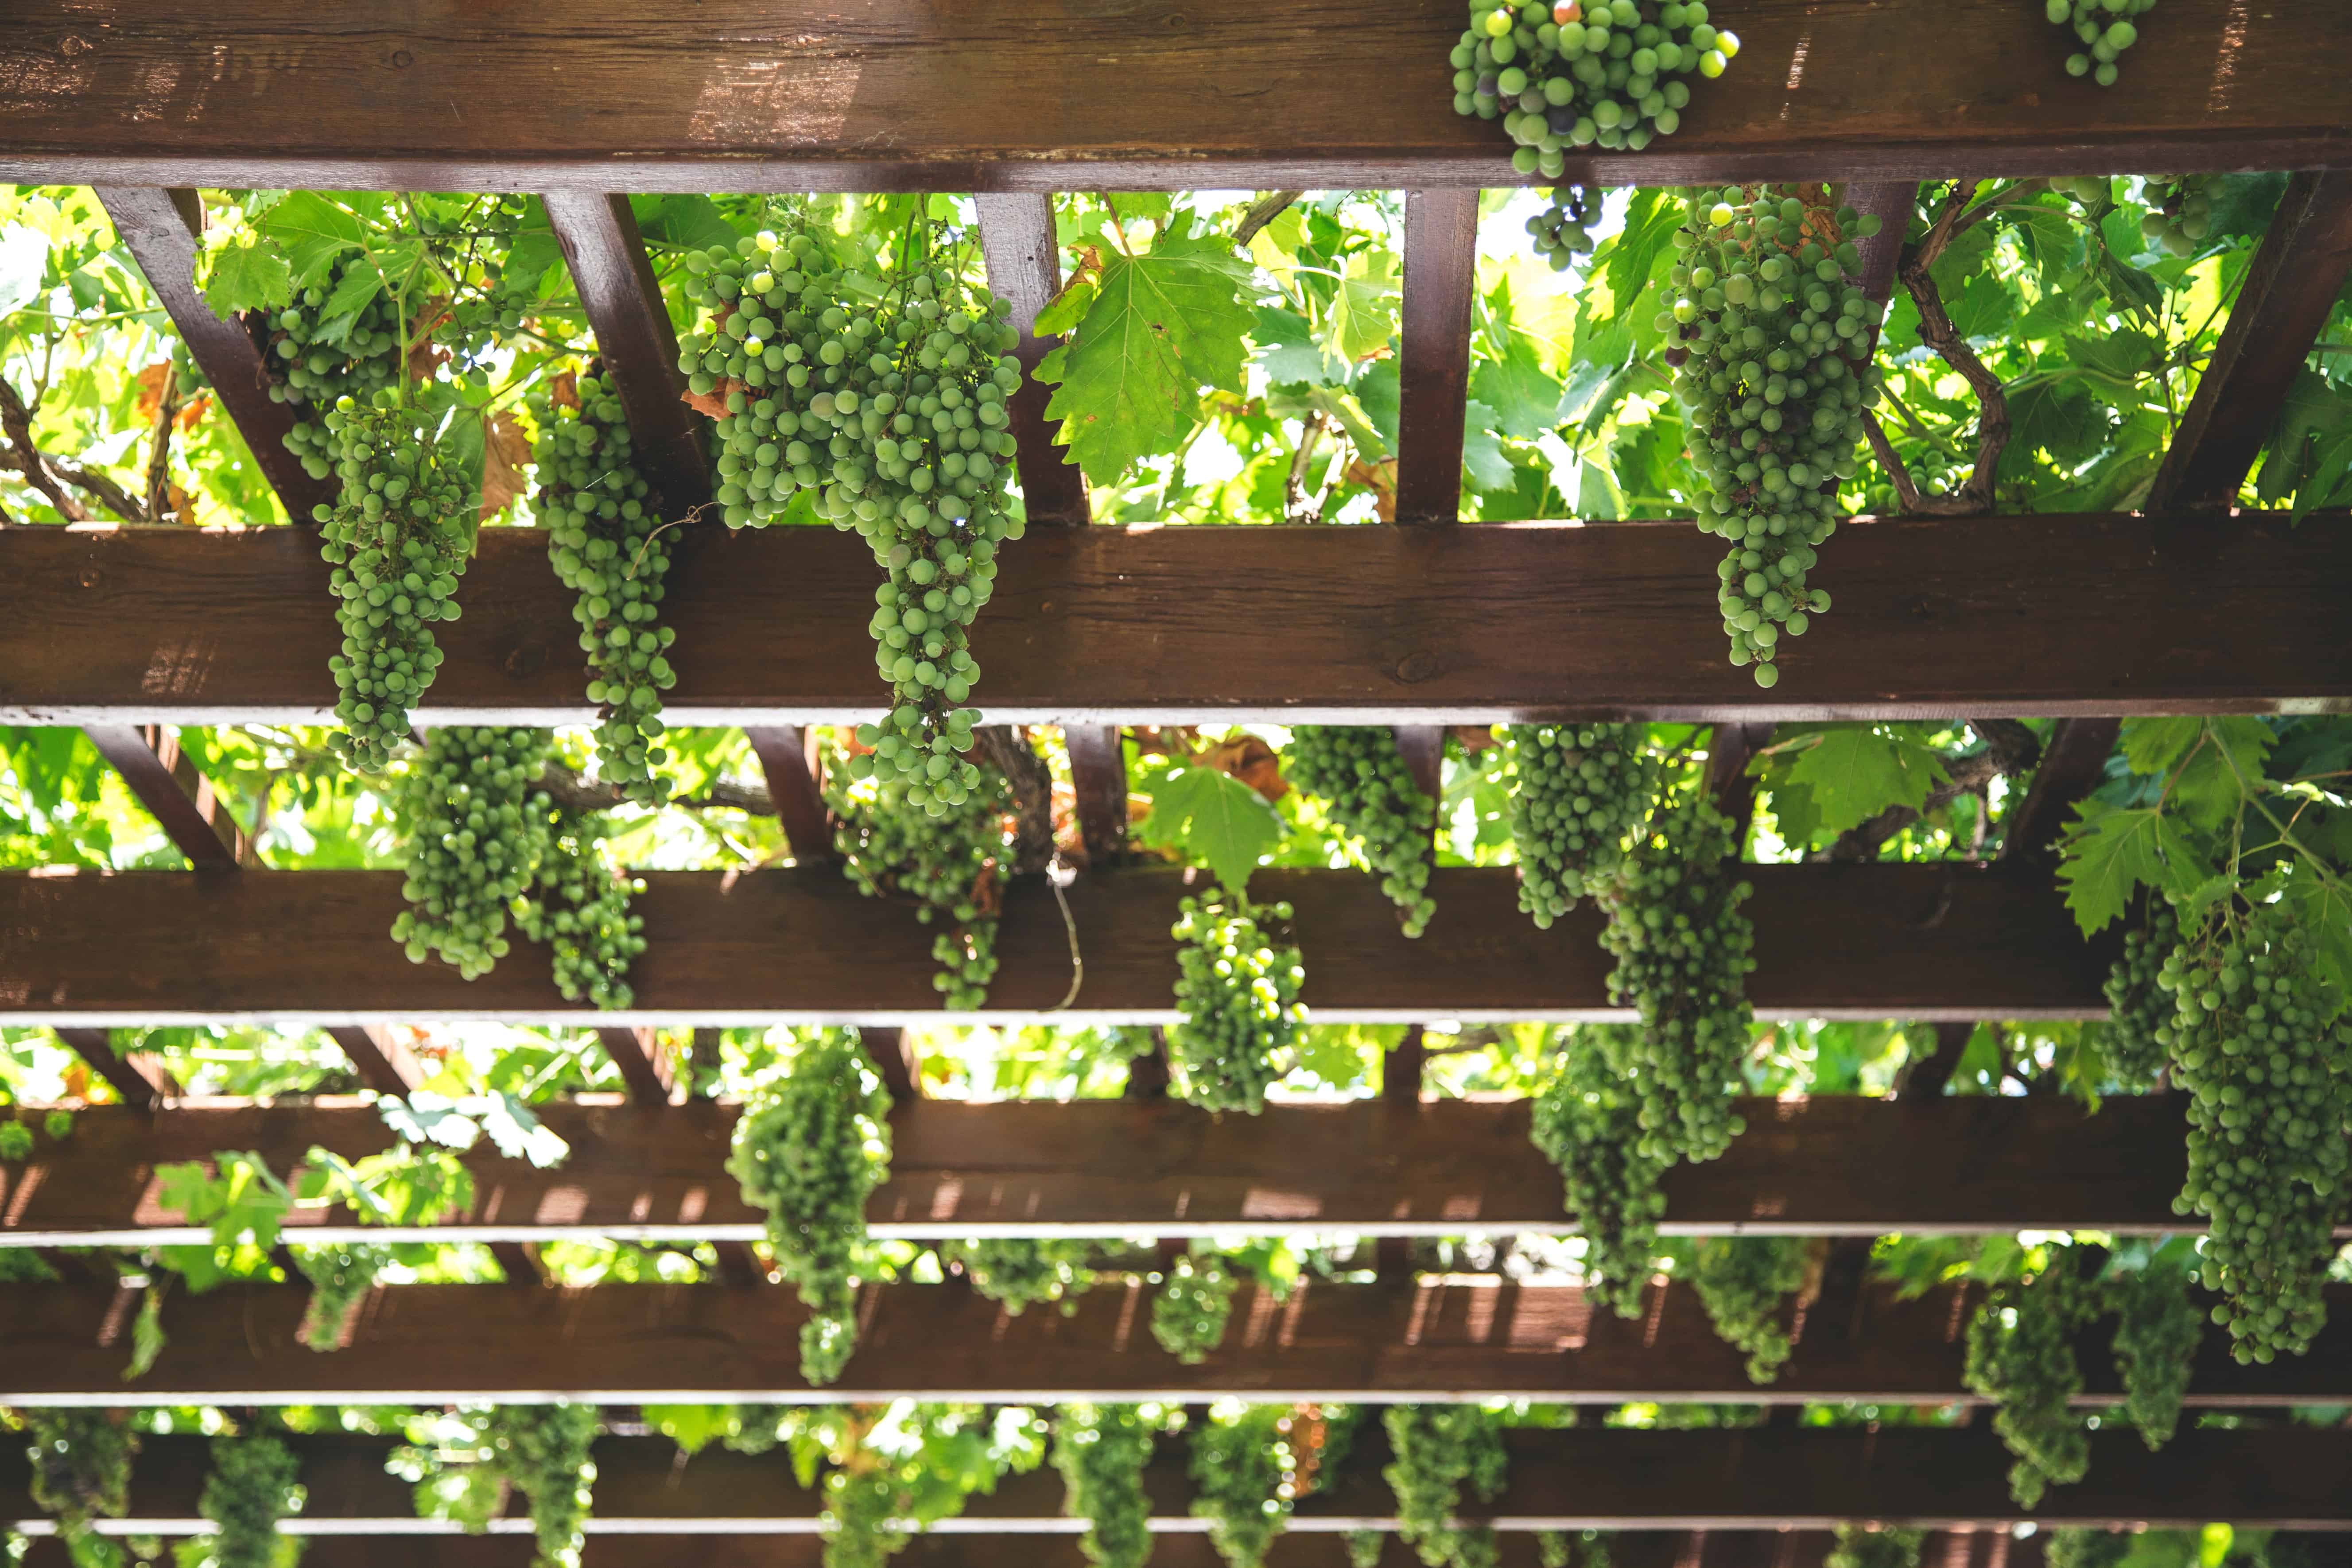
- Grapes
- If it vines and climbs, you can trellis it!

When to Trellis
Ideally, you should have an idea as to what you are growing and what sort of trellis you need before the start of the growing season. It is easier to set up before your plants are in the ground so that you are not dodging plants and accidentally putting posts through developed root systems. That being said, mine didn’t go in until the majority of my plants were well established. While not best case, with careful planning and a little patience even a 5 foot long squash vine can be trained to grow up!

Other Considerations
While planning your trellis, you do need to consider what you are building it for. If, for example, you want to grow large heavy squash you will want to choose something sturdy. You want something that can support the weight of the vines and allow the fruit to grow without too much stress on the stems. For smaller plants, like tomatoes, you can get away with using garden twine or even string.
Think about how high you can reach when harvesting. For me, that’s about 7 ft off the ground and so mine are built accordingly.
Have fun and get creative! There are so many ways to grow a vertical garden that if you get stuck, a quick internet search can help stoke your imagination!
How to Build a Garden Trellis
Supplies for a 4 ft. tall by 4 ft. long Garden Trellis
- 2 – 5 ft. long standard 2×4 pine boards
- 1 – 4 ft. long standard 2×4 pine board
- 2 – 4 ft. pieces of 1×2 lath board
- 8 – 2 inch wood screws
- 6 – 3 inch wood screws for securing to your raised bed
- Cordless drill with appropriate screw tip
- Tape measure
- Saw (if needed)
- Sledgehammer – a standard hammer will work if you put a little muscle into it
- Shovel
- 6 ft. step ladder
- 1 roll of twine
P.S. This is fully scalable to suit your needs. I wholeheartedly encourage you to research other systems because our gardens are a reflection of ourselves and we all have our own aesthetic!
Build Your Trellis
Step 1:
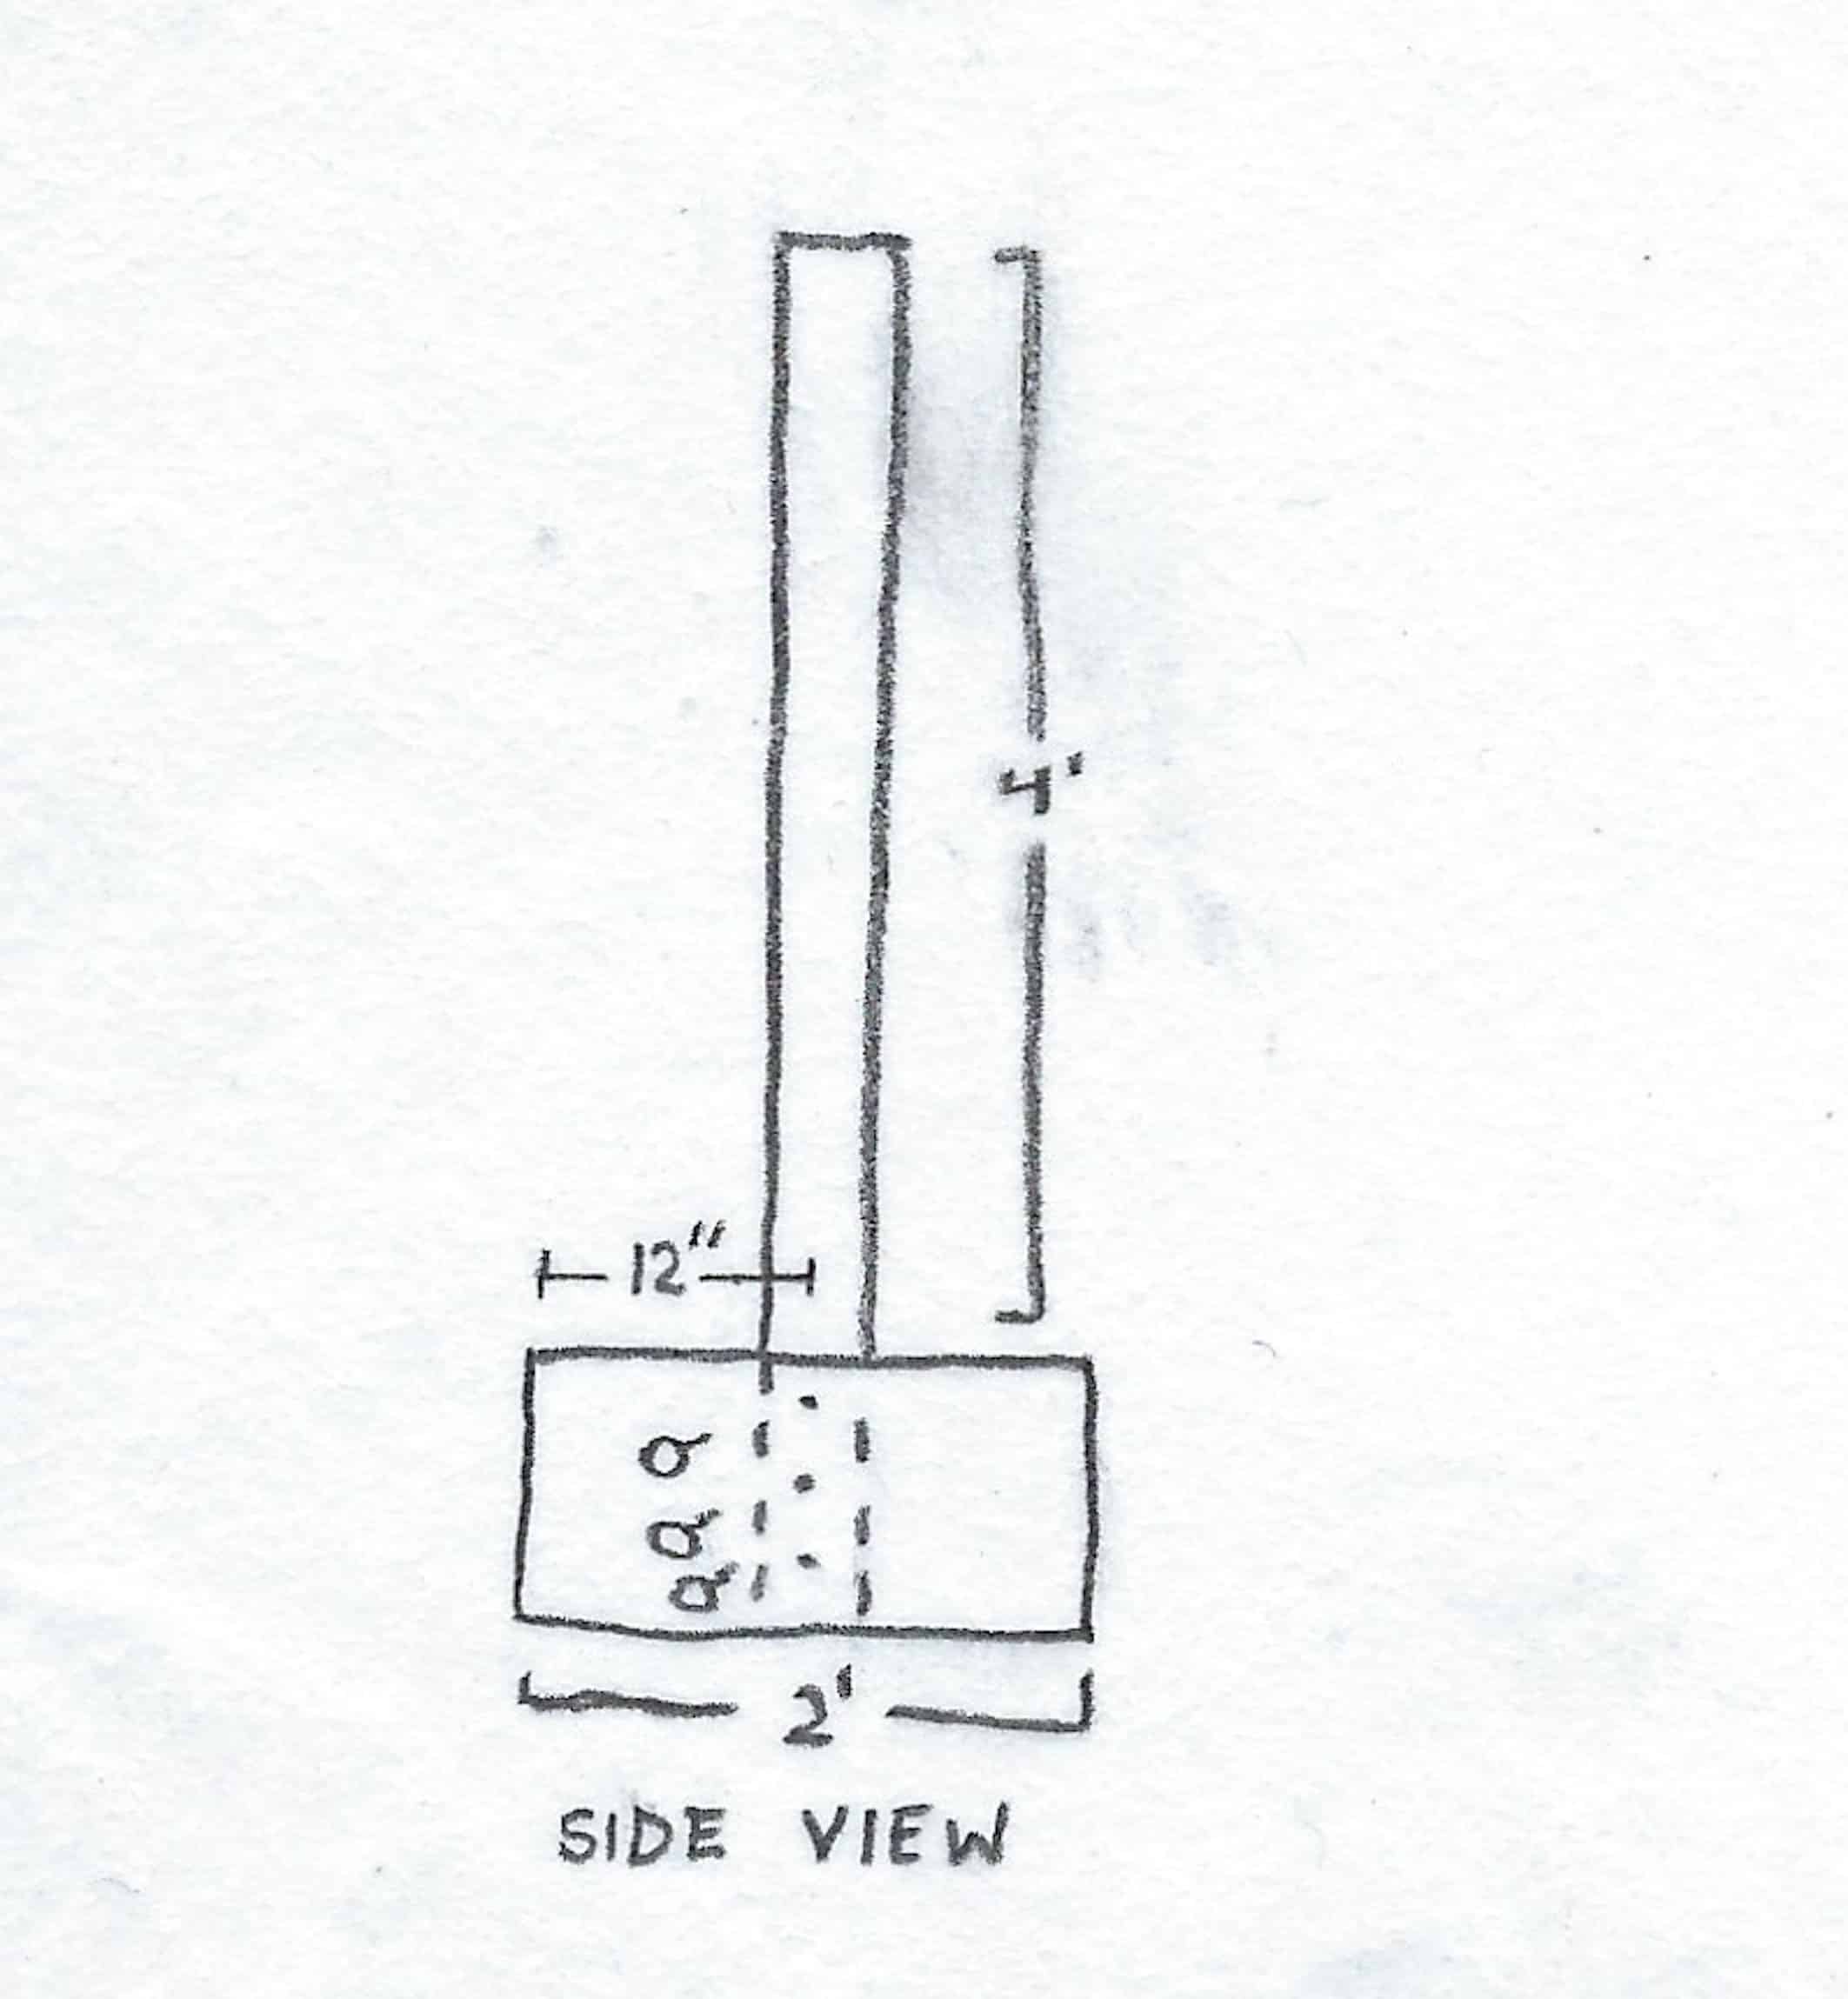
Set your side posts. Take one of the 5 ft. long 2×4 boards and mark a line on it 1 ft. from the bottom. On the short side of your raised bed, measure and mark where your upright will go; on a 2 ft. wide bed, the center will be perfect. Stand your board upright inside the bed with the wide side of the board pressed against the inside wall of your bed centered on your mark. Using your shovel and/or hammer, set your post so that the 1 ft. mark is level with the top edge of your bed. Take 3 of the 3 inch wood screws and, working from the top down, secure your upright to the side of the box. Repeat on the opposite side; backfilling with dirt around the posts after you are finished.
Step 2:
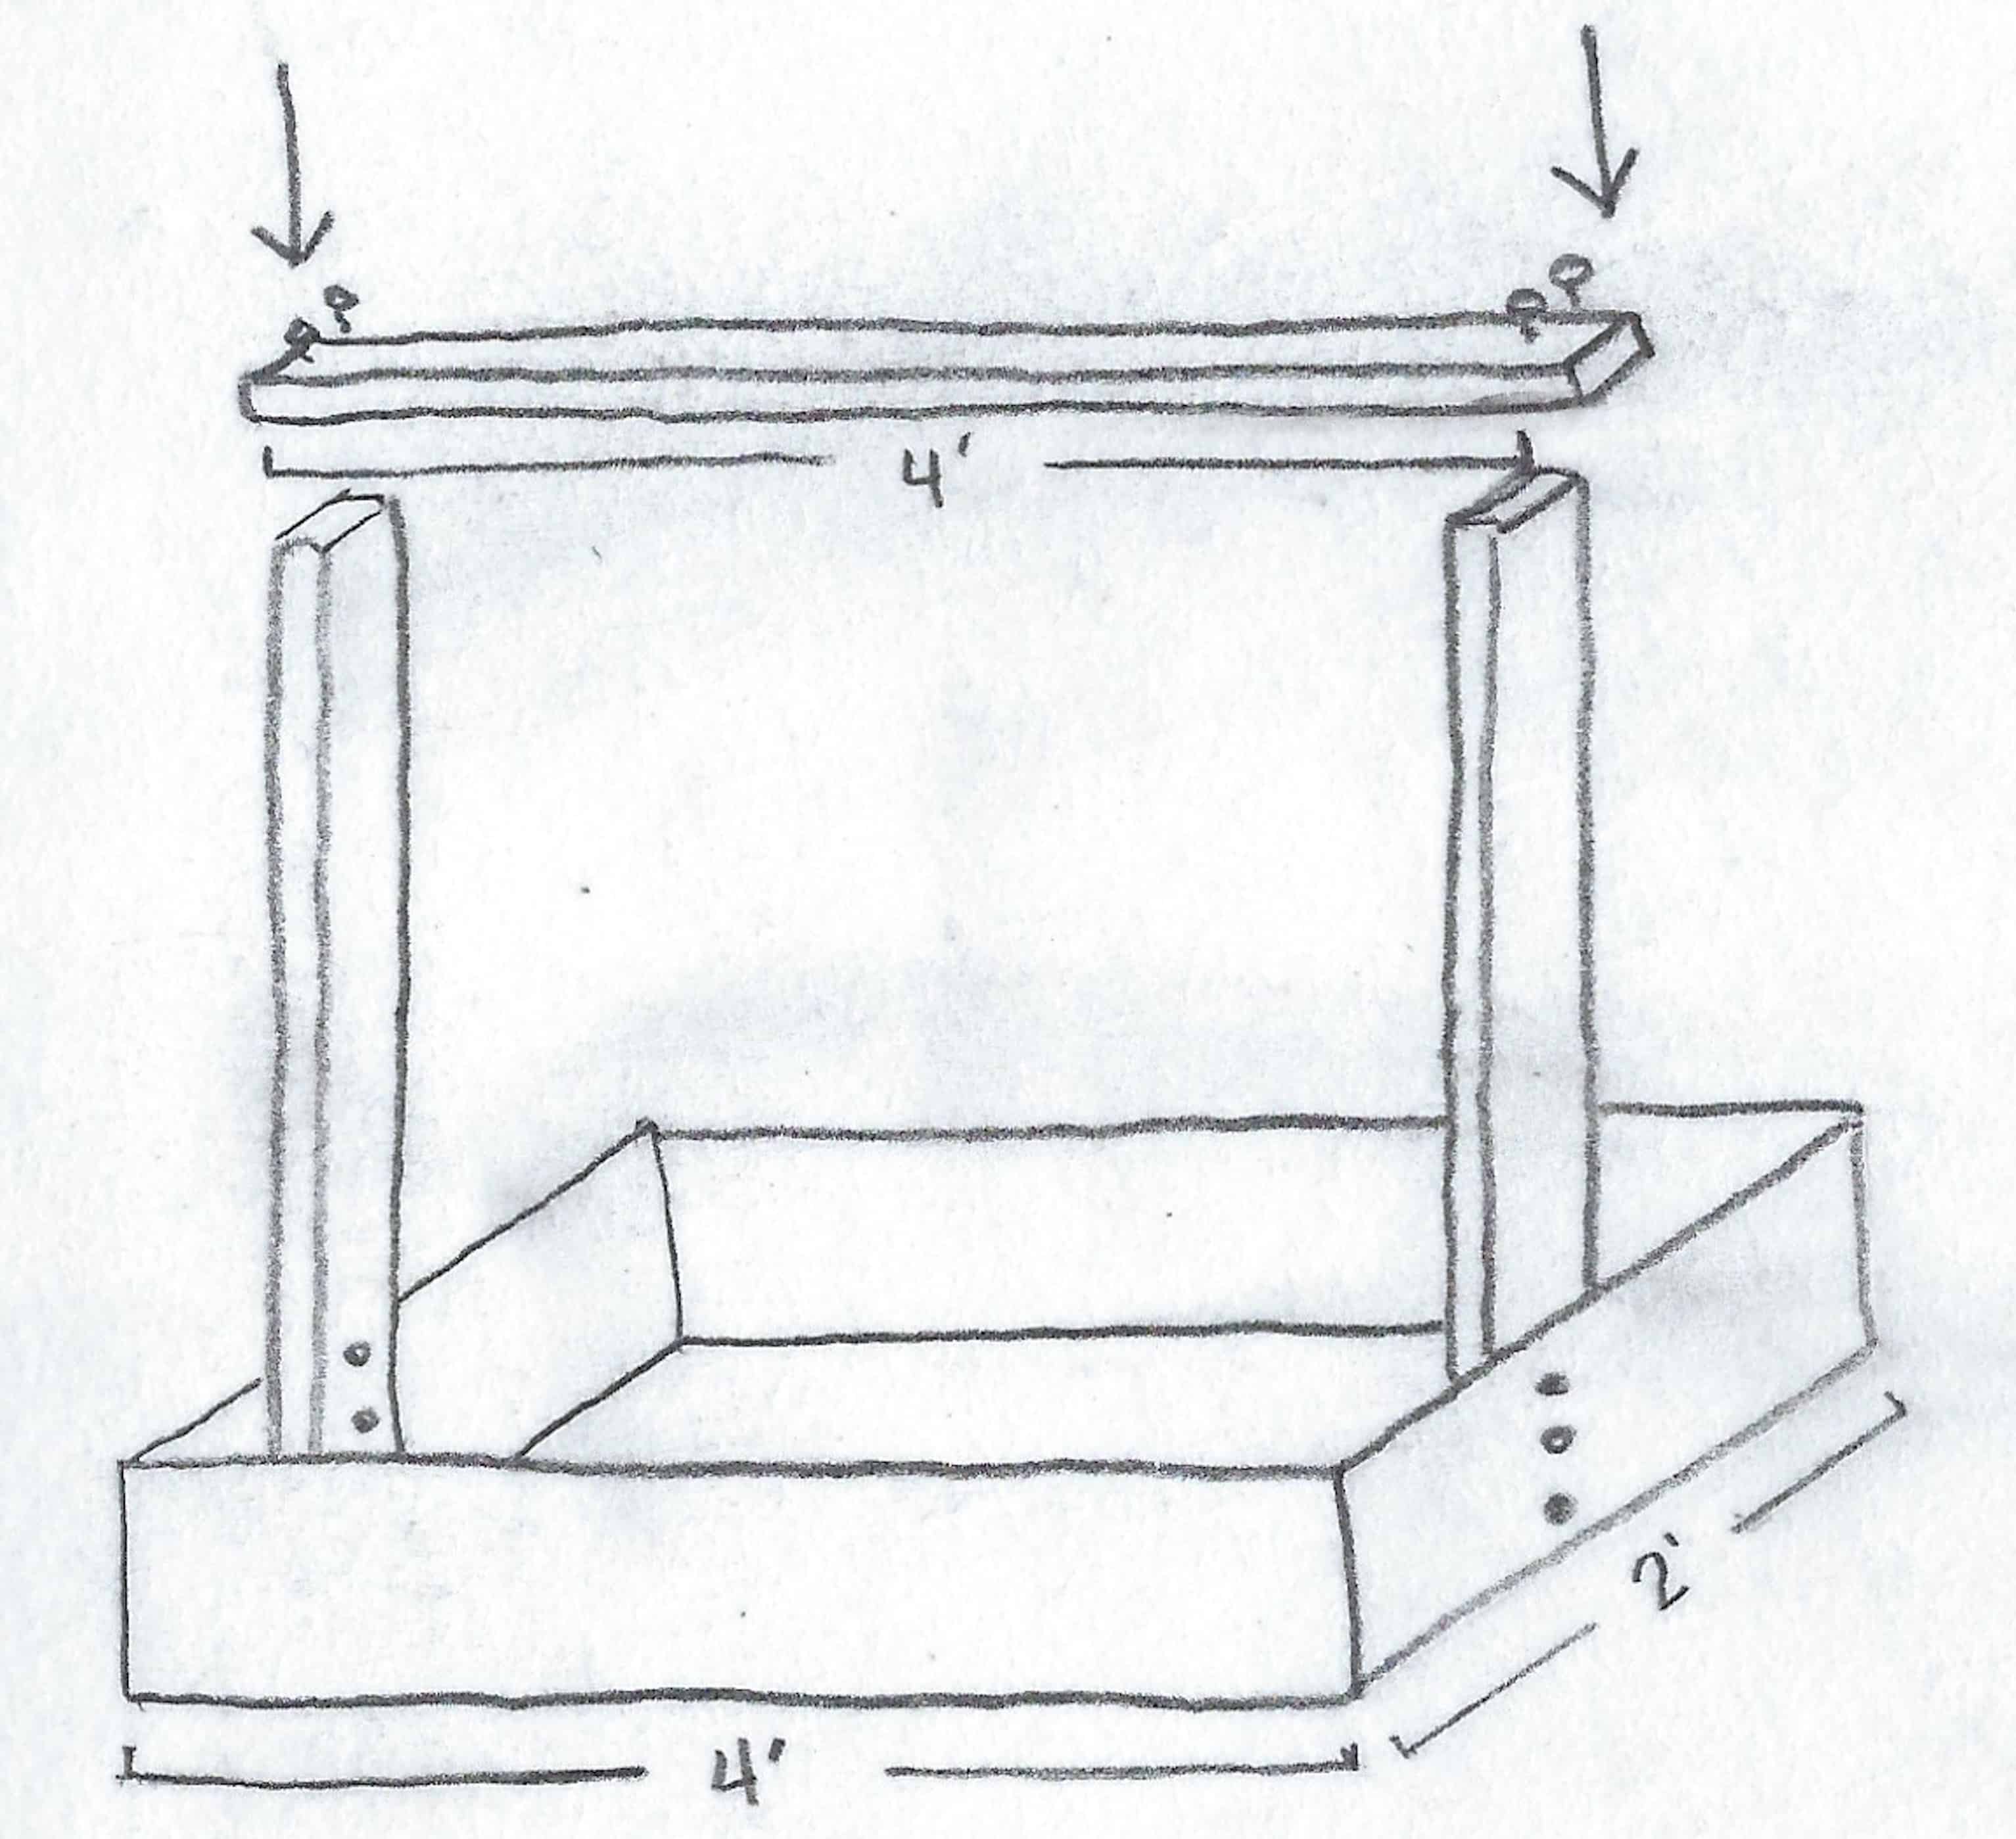
Set the top piece. Take your 4 ft. long 2×4 and lay it across the top of your two uprights so that the edges are flush. Secure each side by screwing two of the 2 inch wood screws into each end, straight down into each upright.
Step 3:
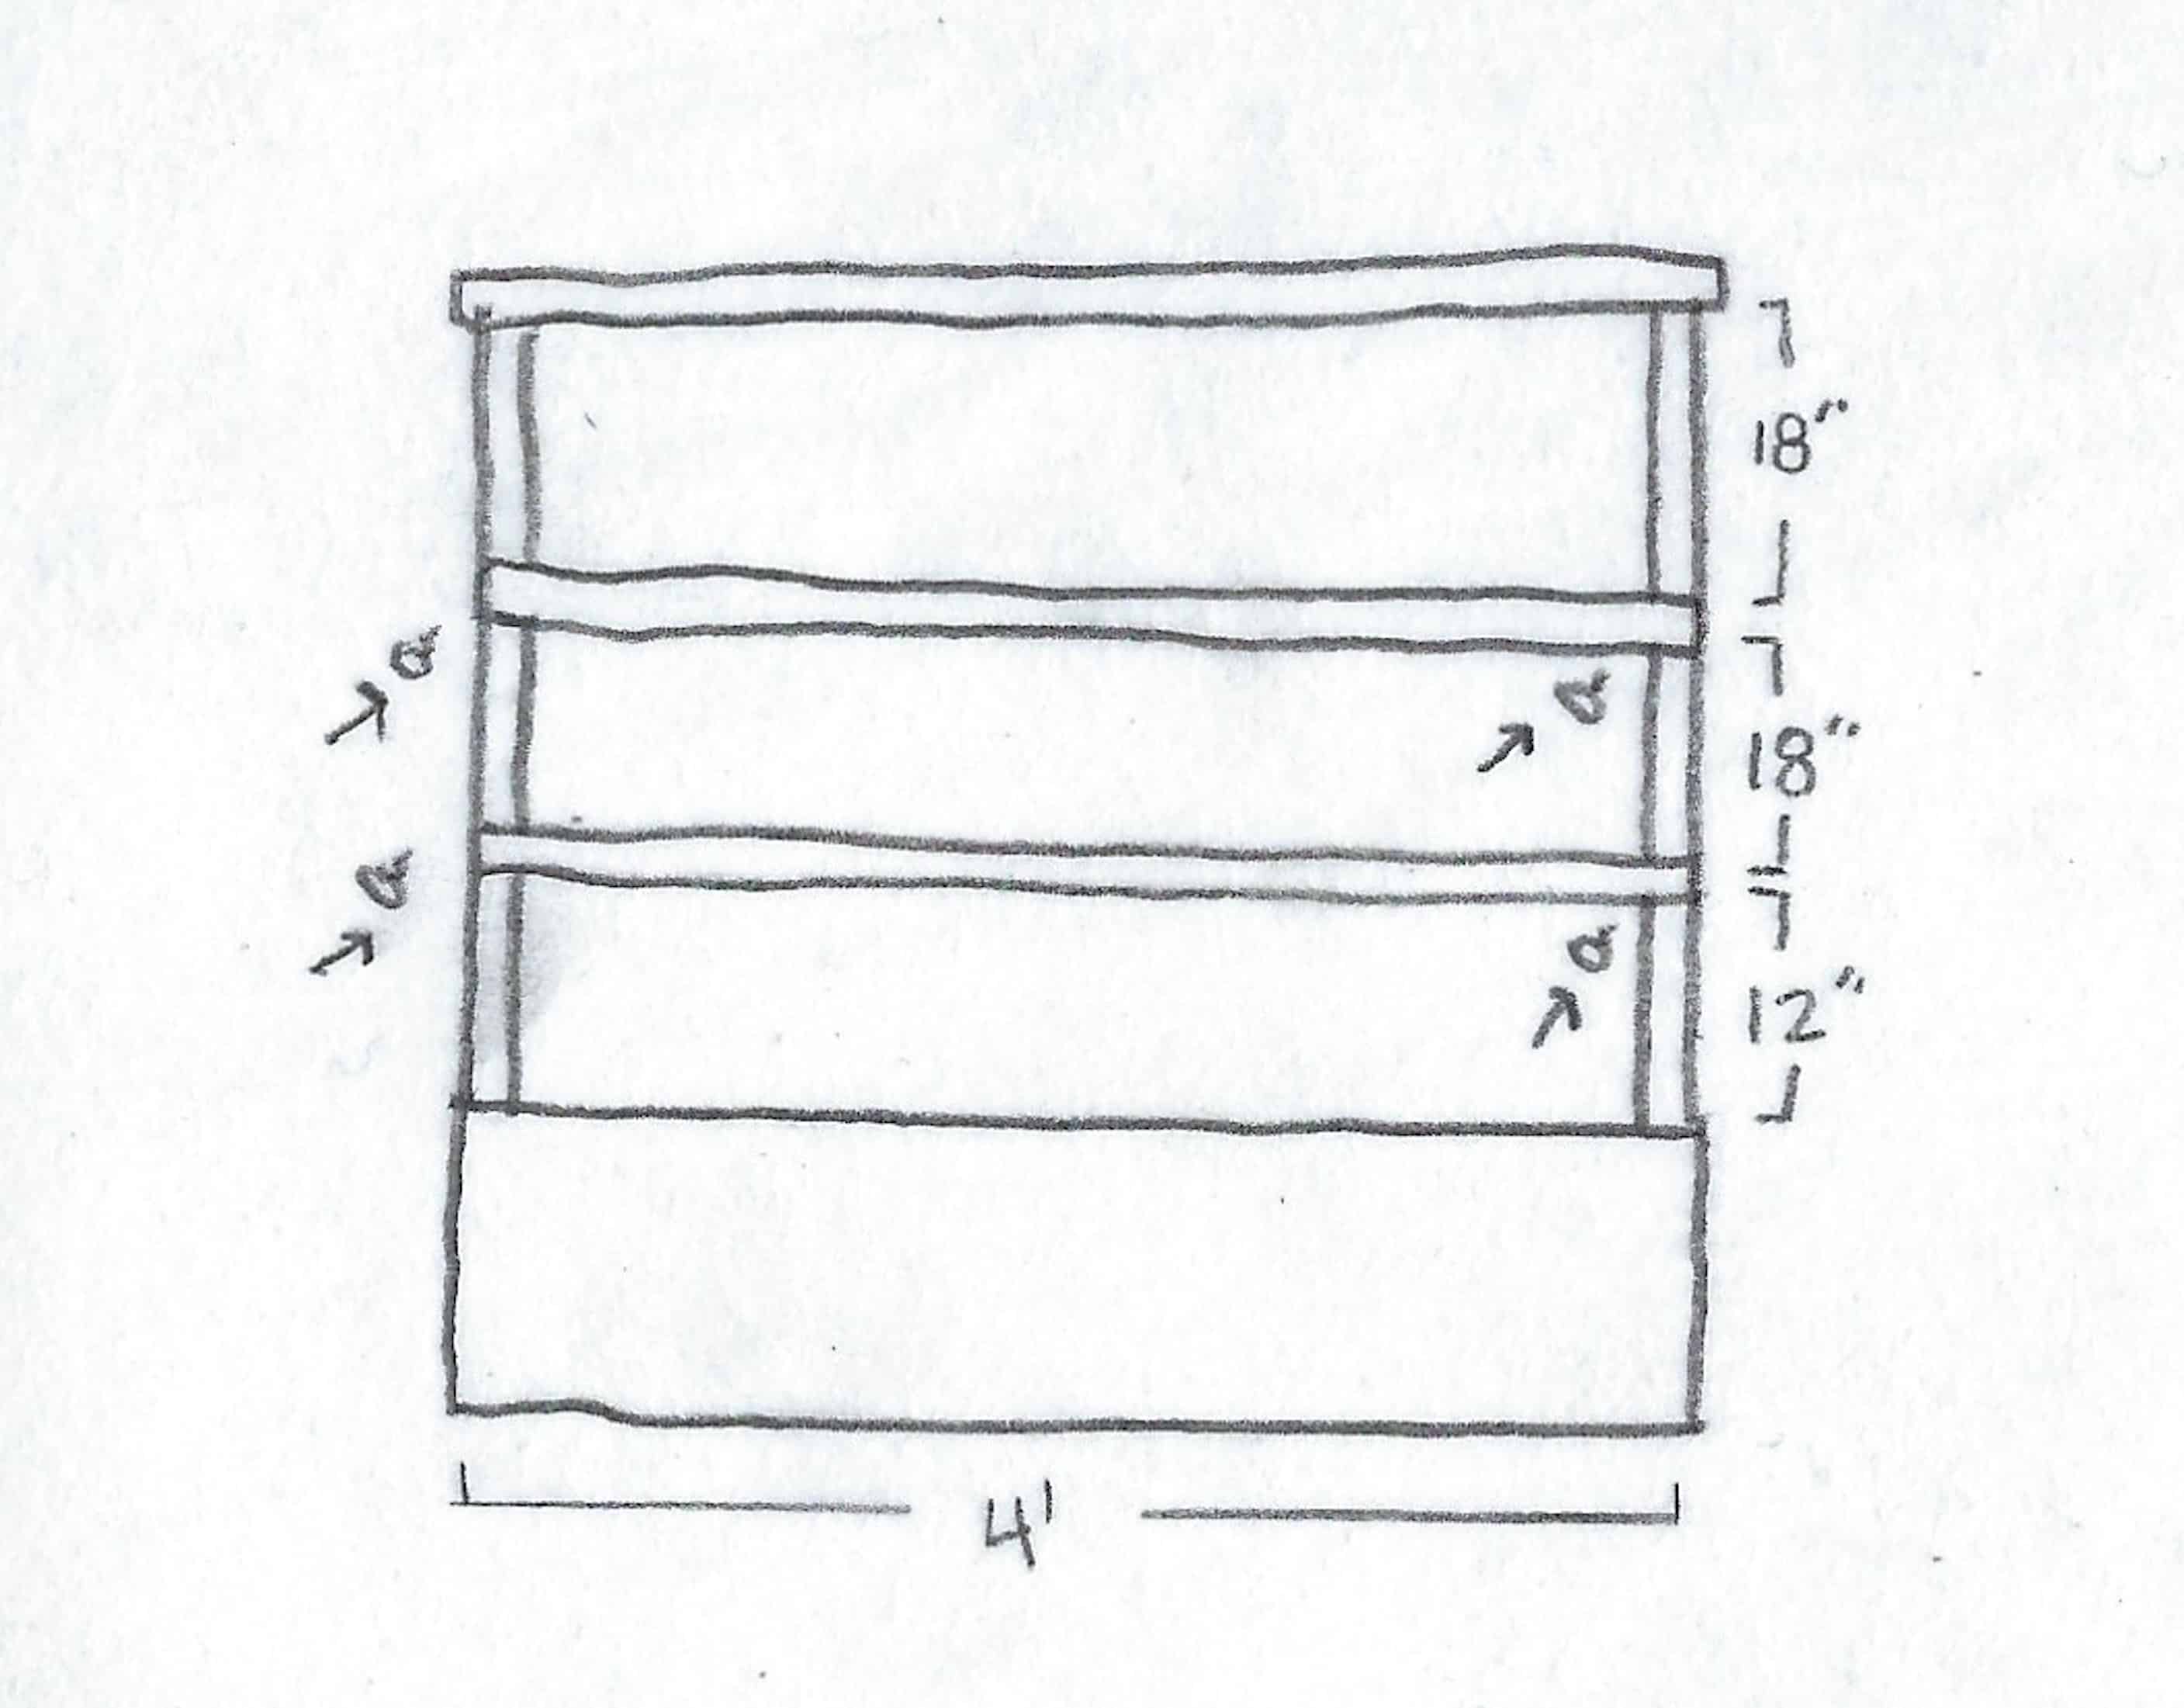
Place your horizontal pieces. Measure 12 inches off the top of your box on both uprights. Take a 4 ft. piece of 1×2 lath board and secure each end with a 2 inch wood screw. Repeat 18 inches higher on the uprights with a second piece of lath. You may add a lower cross piece that rests on the top edge of your box if you like.
Step 4:
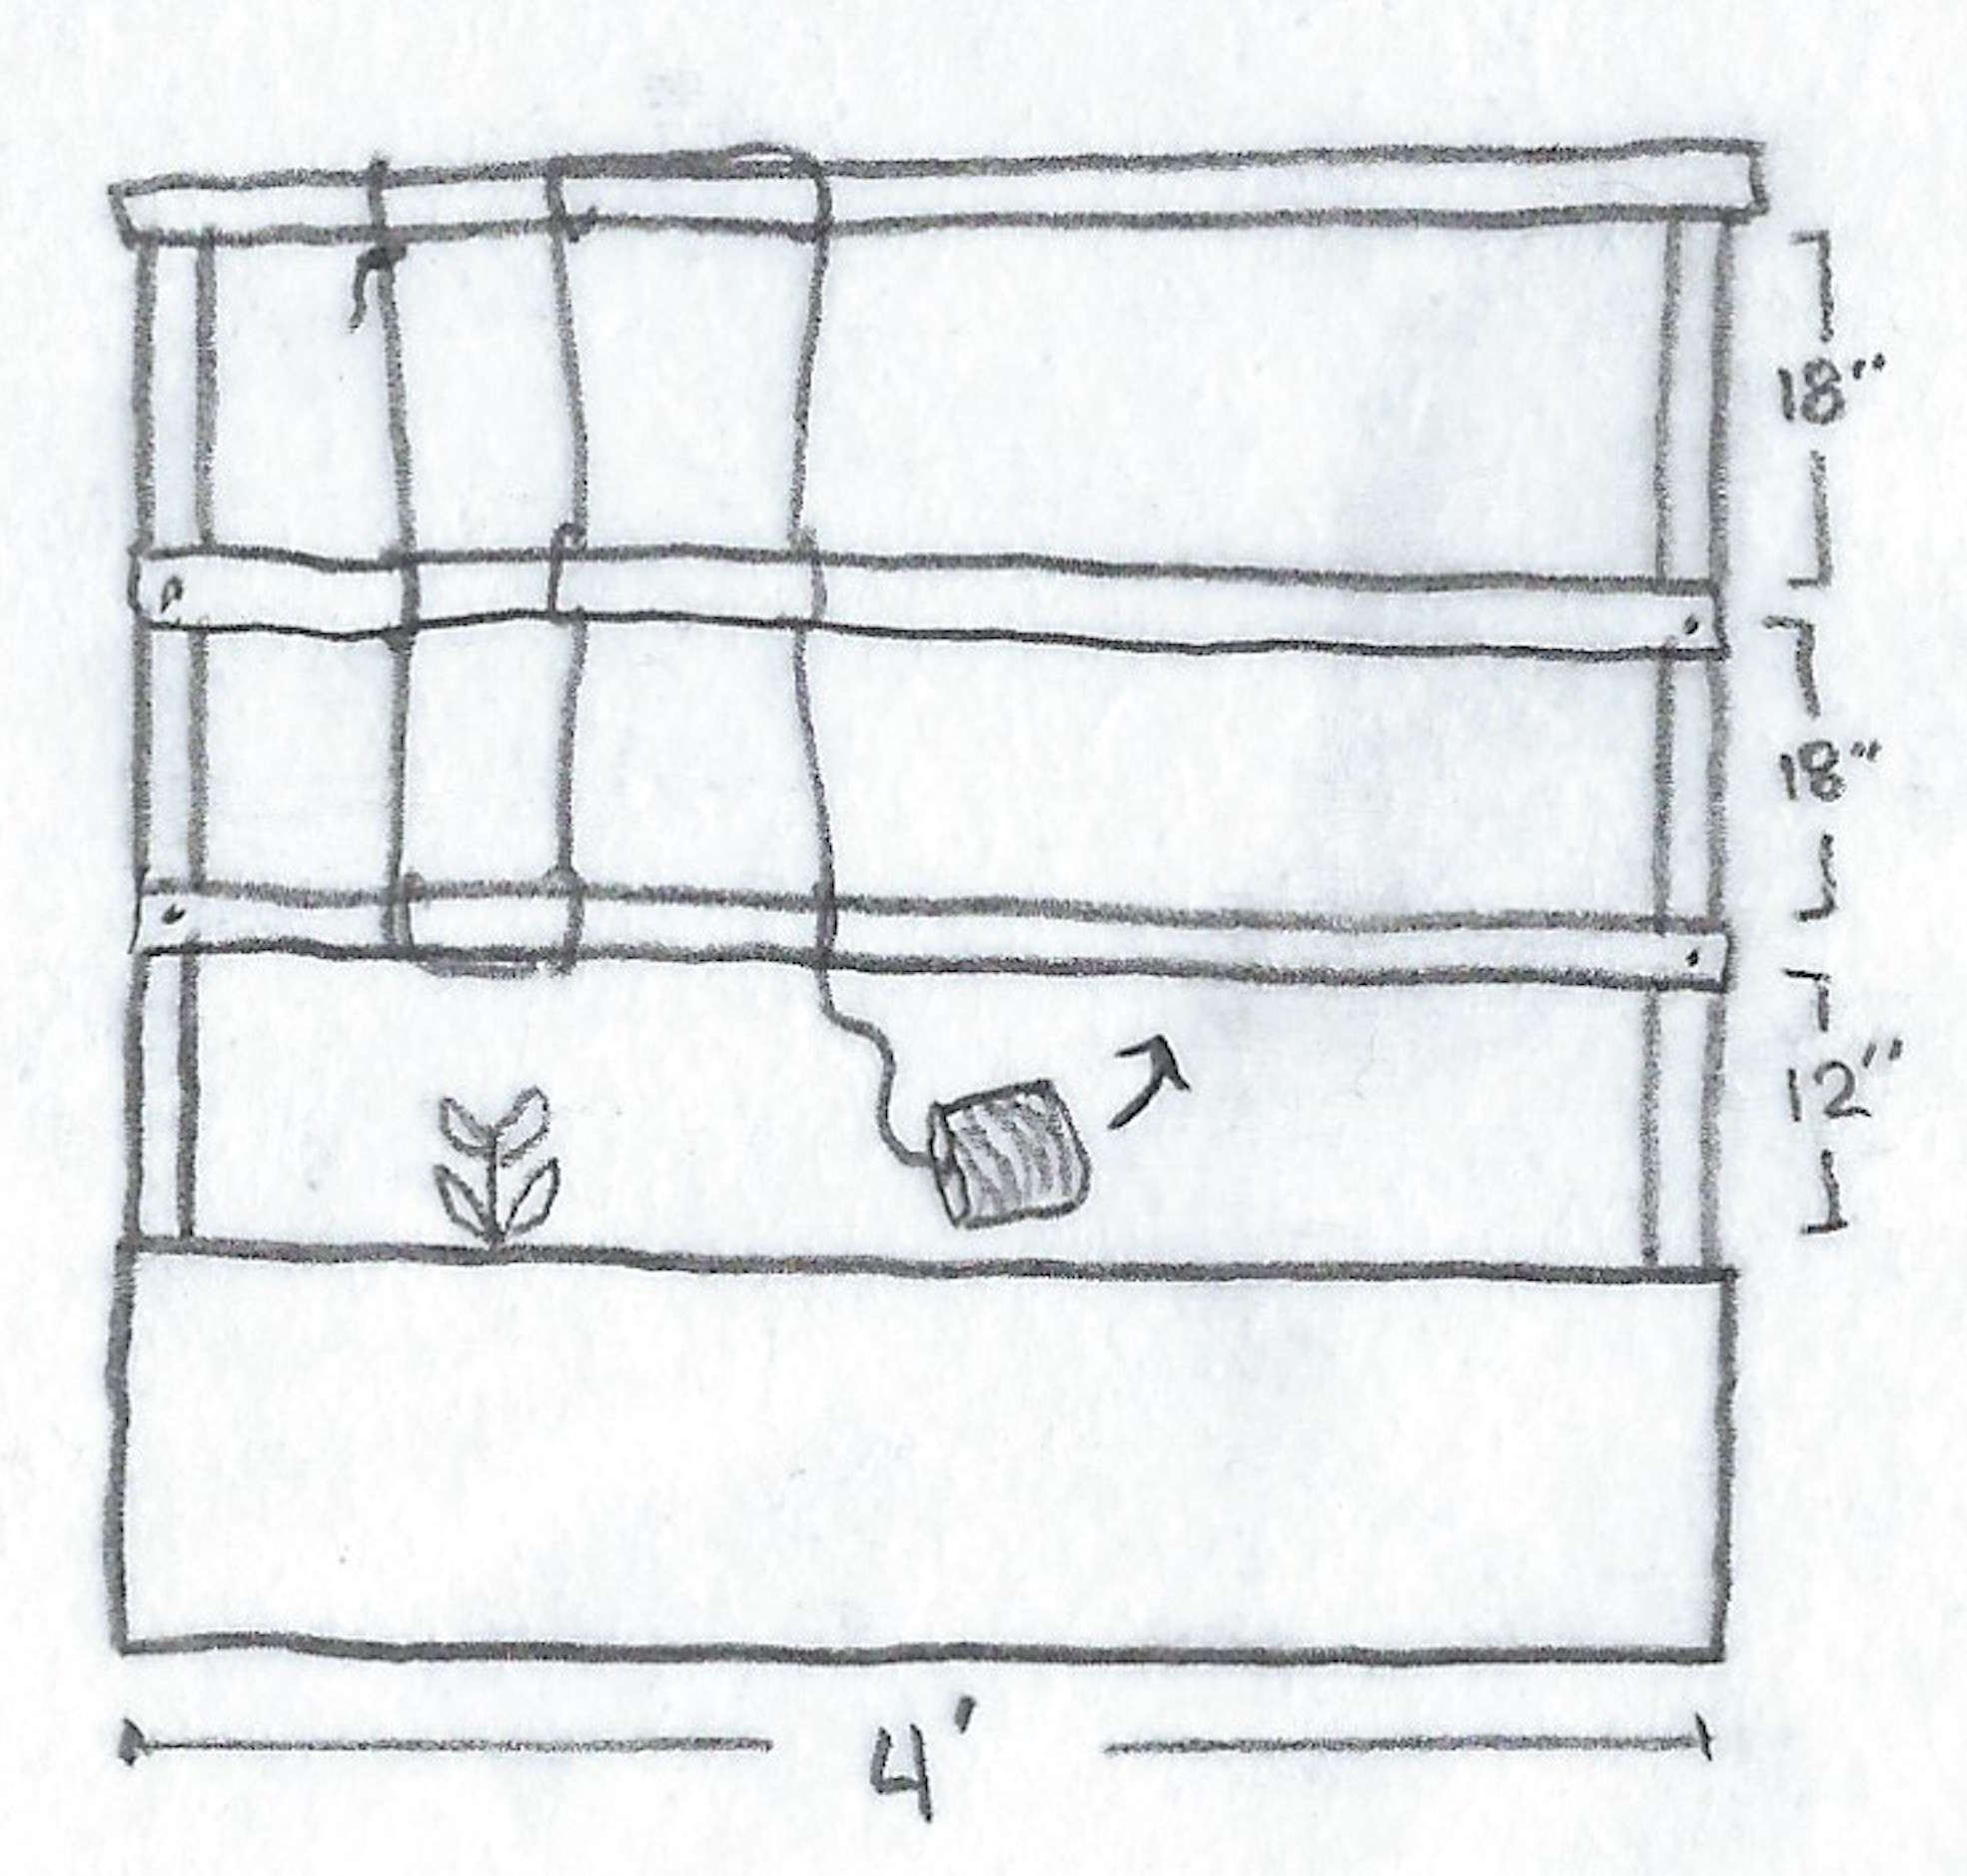
Create twine verticals for climbing vines. Taking your roll of twine, tie the loose end to the top bar of your trellis about even with where your first plant will go. Wrap the twine so that you go down your horizontal pieces and then back up; working until you have created a grid pattern over the entire trellis. Tie the end, clip it, and wait for your plants to grow!
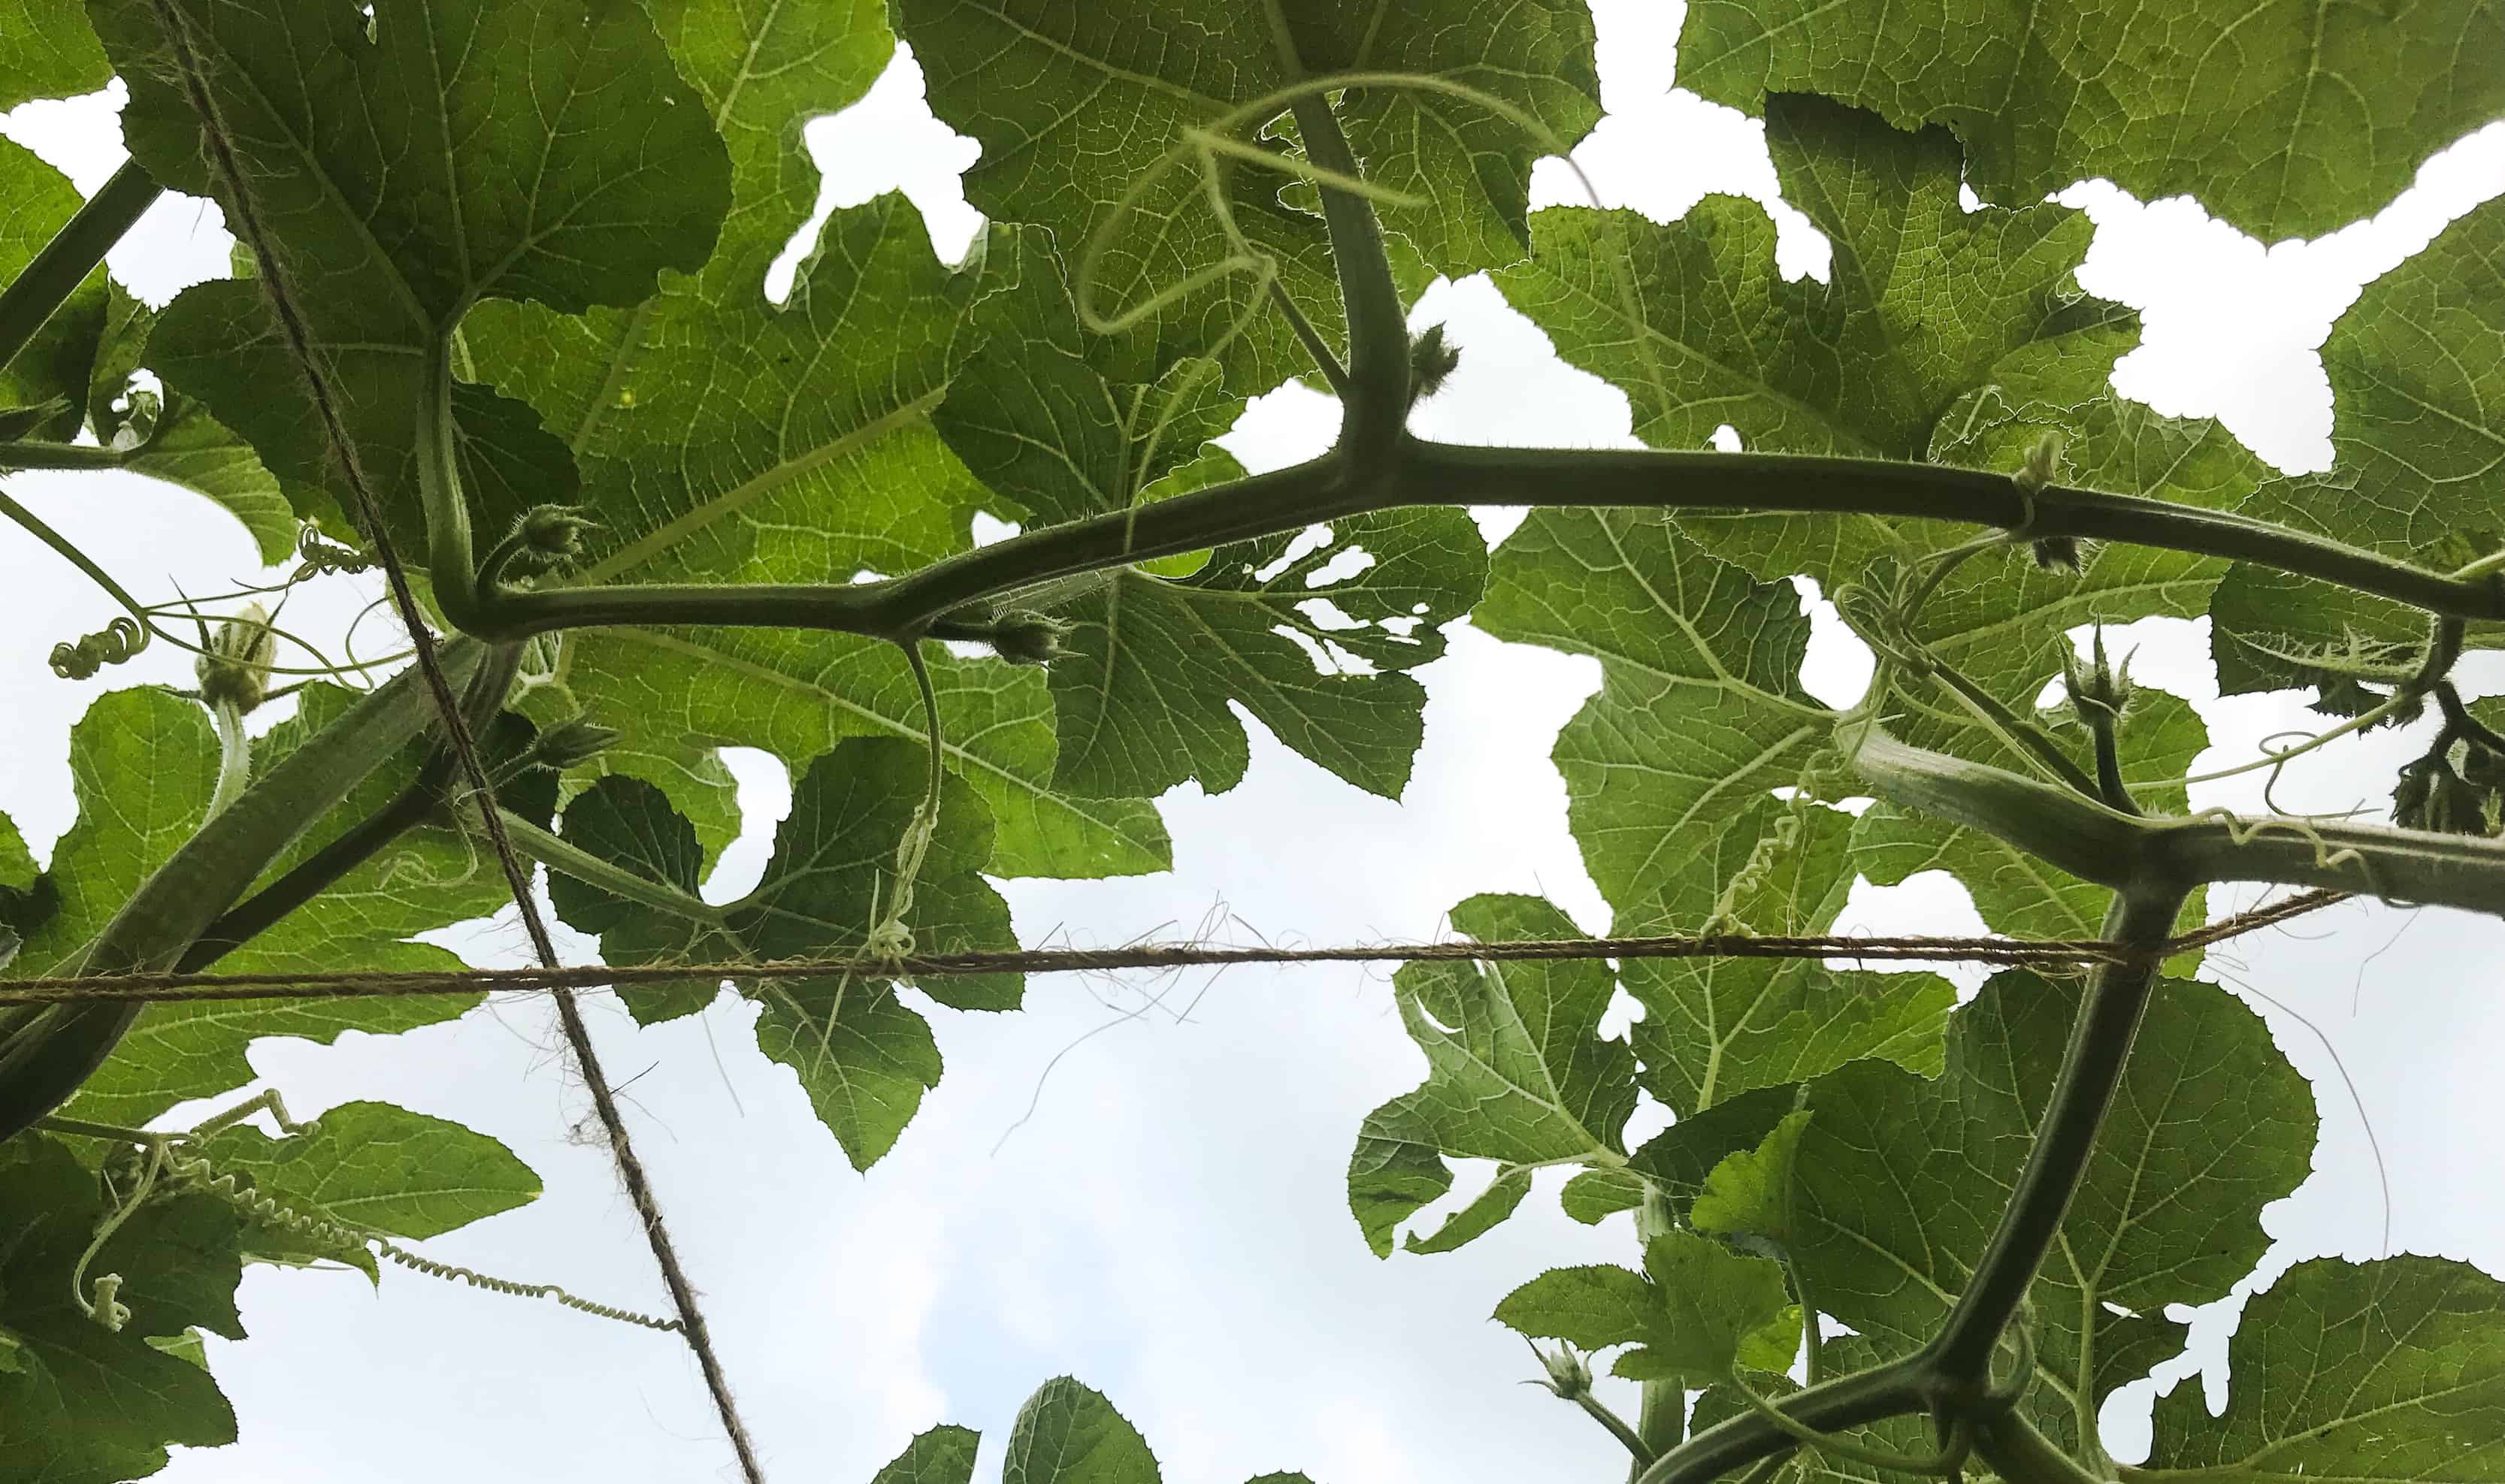
Tip: As your vining plants grow, they will go wherever their center vine is pointing. You train them by carefully twisting this ‘leader’ up the twine and they will follow right on up and over the top of the trellis. Some plants, like cucumbers, peas and squash, send out special little branches whose sole job is to grab and wrap around whatever is close by to help pull them along. How cool is that?! And don’t be afraid to prune off branches that don’t look healthy or aren’t producing fruit!
Don’t forget to let us know what you think about this garden idea! You can comment below, follow us on Instagram @georgiapellegrini, and check out Georgia’s Facebook page as well!!

