
I have been posting various stages of this project on my social media accounts for the past few weeks and have gotten a lot of inquiries for how to make these bad boys. Well, first off, the step-by-step instructions are in my book Modern Pioneering, (do you have a signed copy yet?) along with some other amazing Martha-Stewart-Meets-MacGyver projects. But here I am posting it for you to show you an easy way to make homemade fabulous holiday gifts for practically nothing. To get these I simply called a local wine bar and asked them to save them for me one night and picked them up the next day.
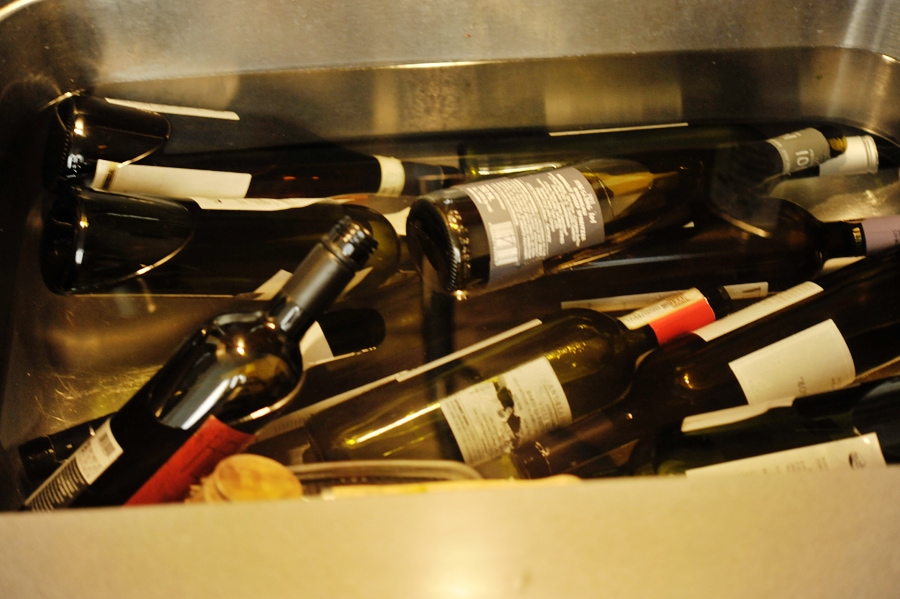
Rather than recycle your glass bottles, upcycle them and enjoy them as glassware. Bonus points if you have bottles with screen printing on them rather than a sticker; the former makes for an edgy-looking drinking glass. There will be some casualties in this process, so have extra bottles on hand. And you can use everything form wine bottles to beer bottles.
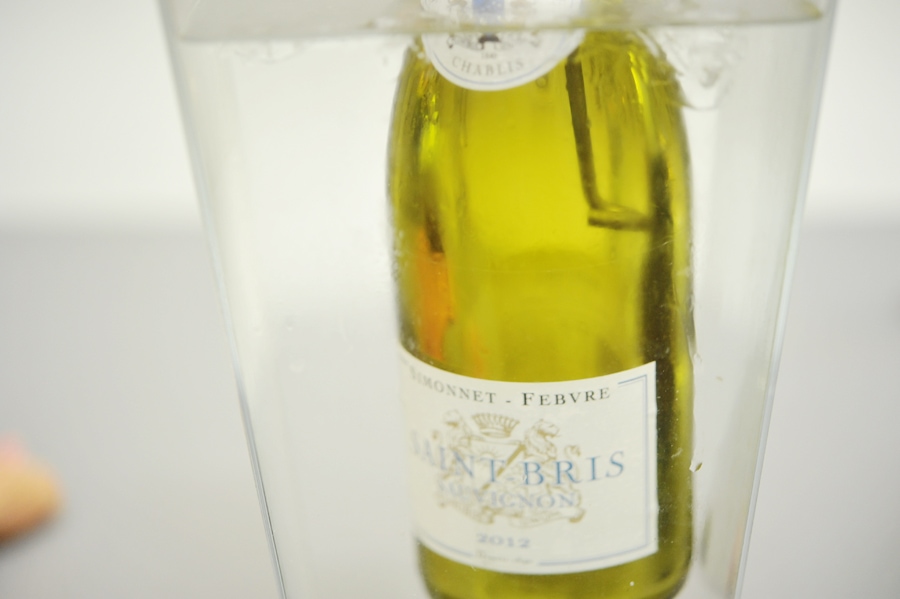
Start by soaking your bottles in a sink full of water, up to overnight. You need to get the labels off so that you can cut them easily. Some will have very difficult glue and those ones will require paint thinner. Once you find a type of wine that has easily removable labels and the perfect glass thickness that seems to cut well every time, make a note of it so you can buy that brand! (Assuming it’s a good wine to drink of course).
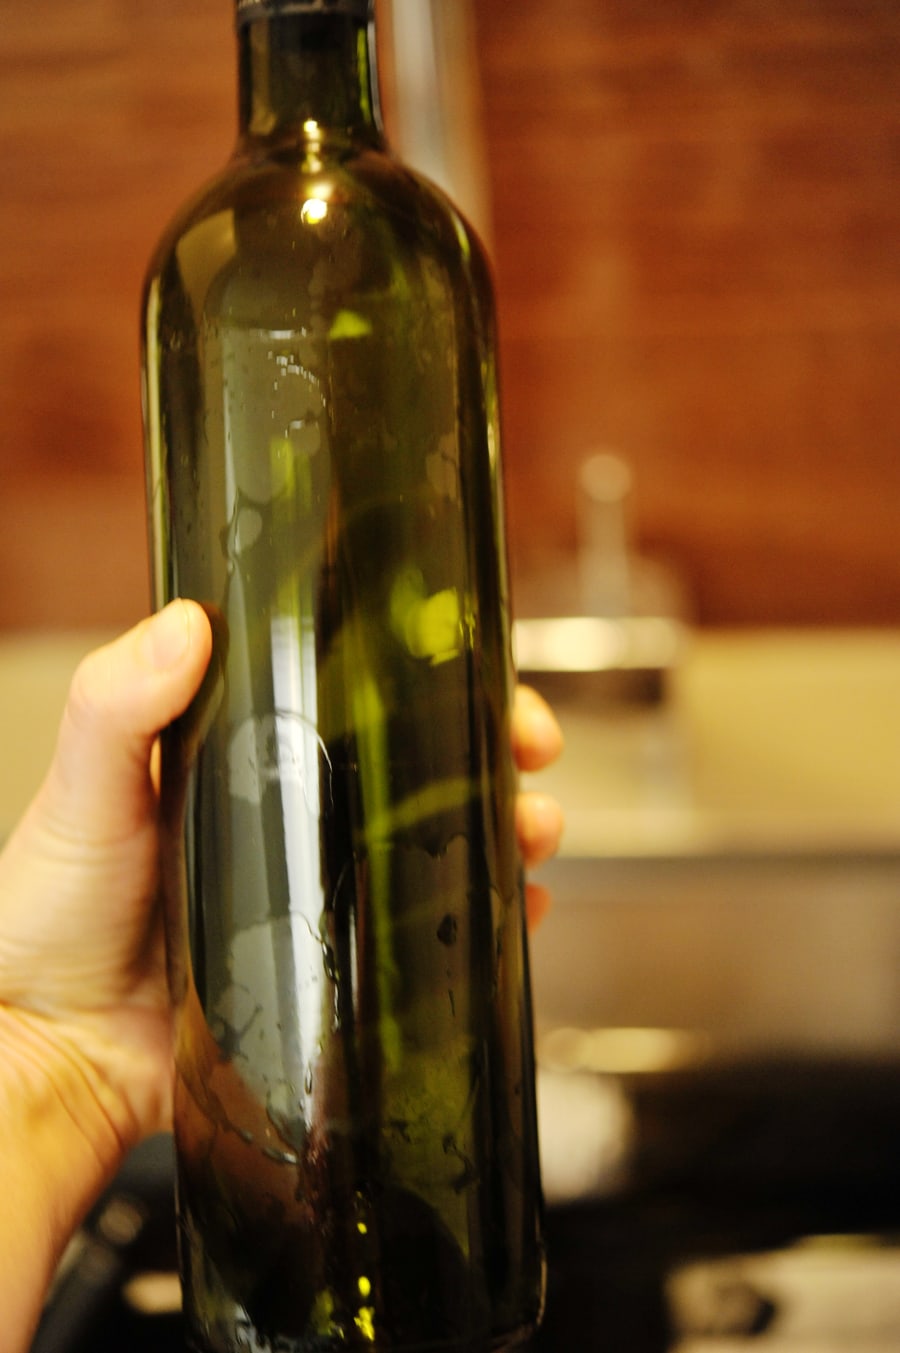
Once you have squeaky clean bottles you are ready to go.
You can purchase a glass bottle cutter online. They are cheap.
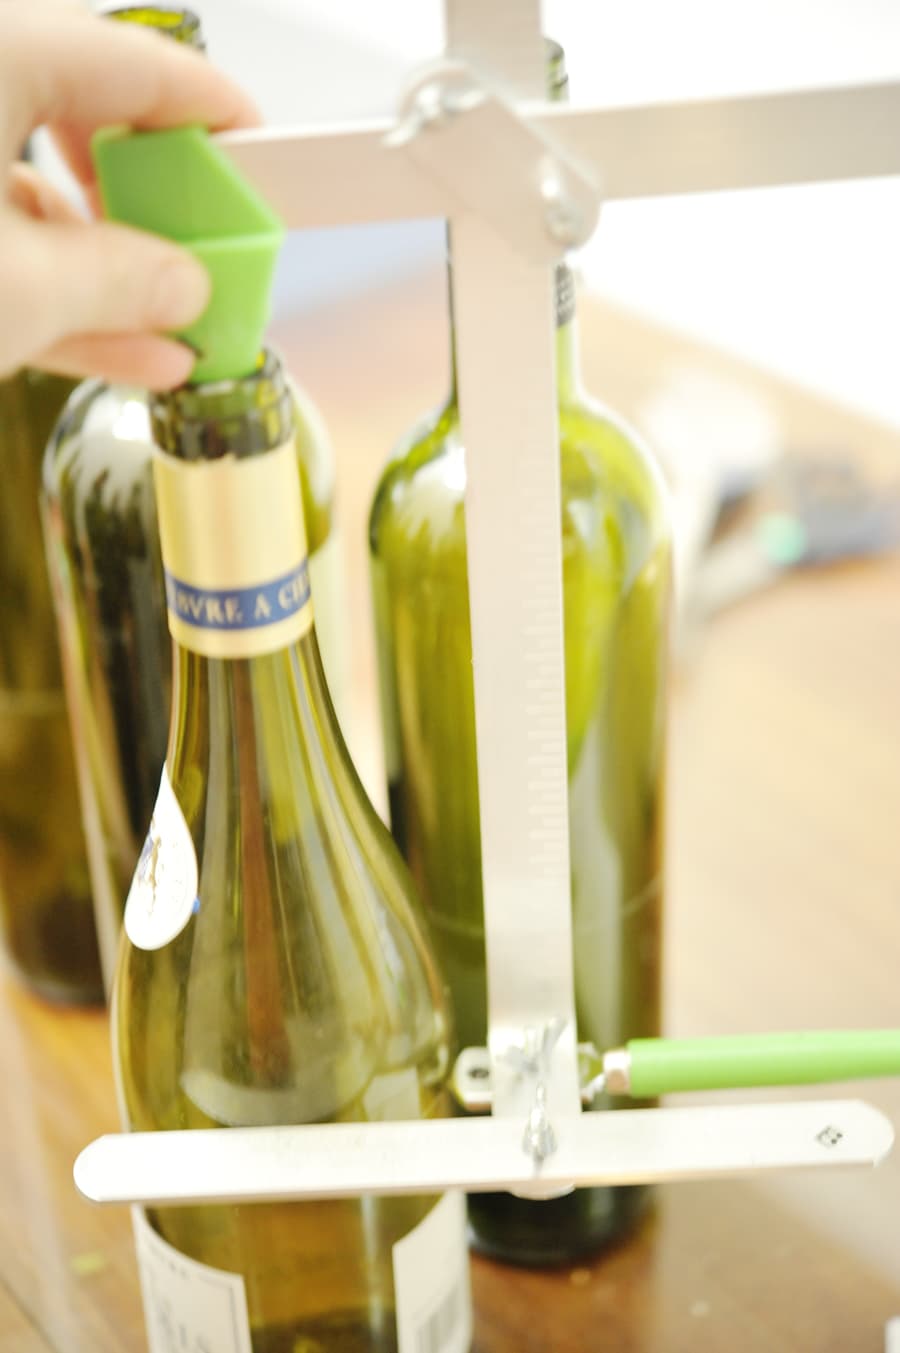
Different bottles will have different heights. You want to consistently measure the line of your previous cutting with the height of the blade on the next bottle before cutting. As you can see here I have not removed the label on this bottle because it falls below the line where I need to cut. But you have to remove it eventually so it would be wise to do it all at once.
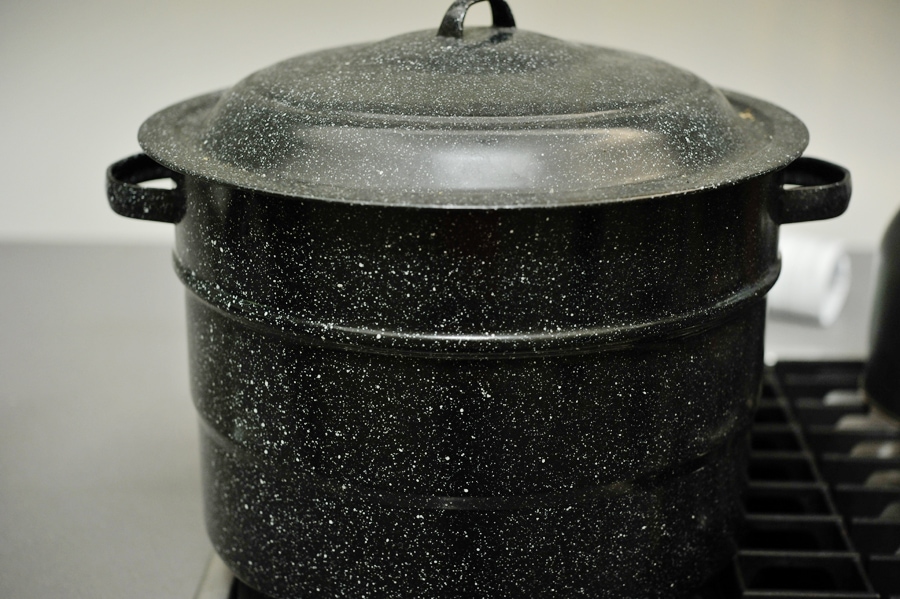
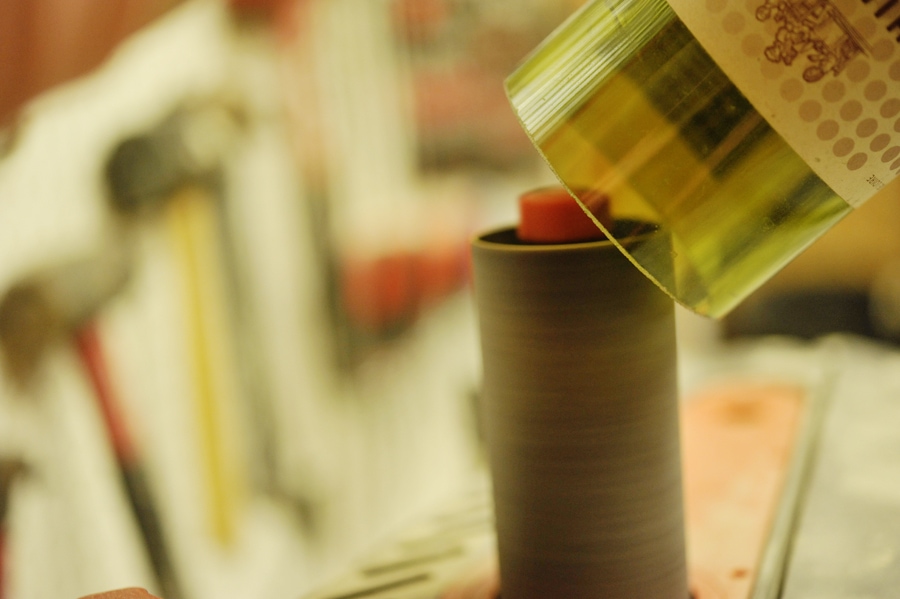
Get a deep pot of water boiling. You want it deep because the bottles need to be dipped in above the cut line, ideally without touching the bottom of the pot.
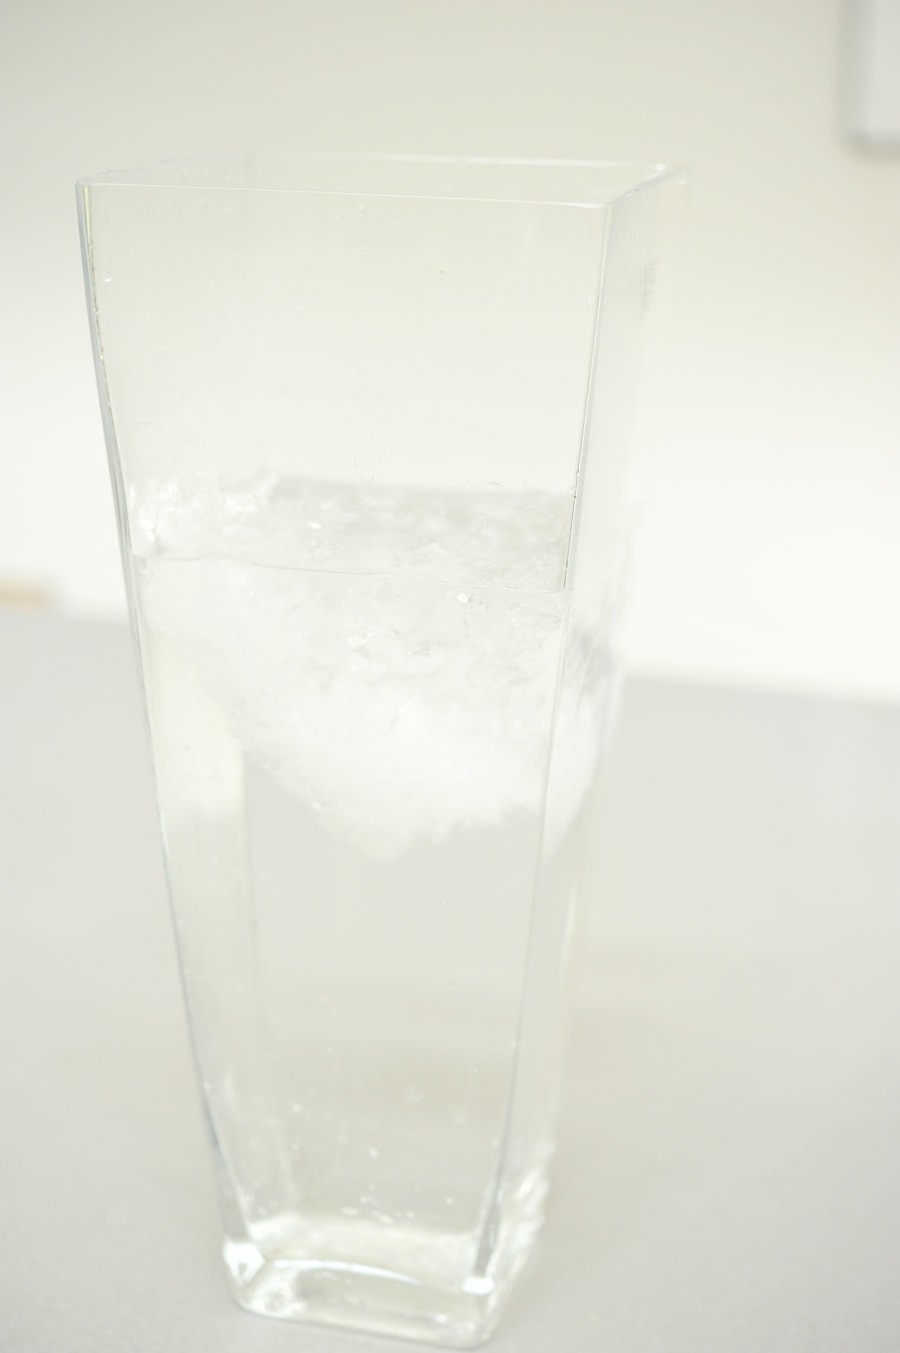
Get a tall container of ice water prepared. I used a very tall vase but anything will work.
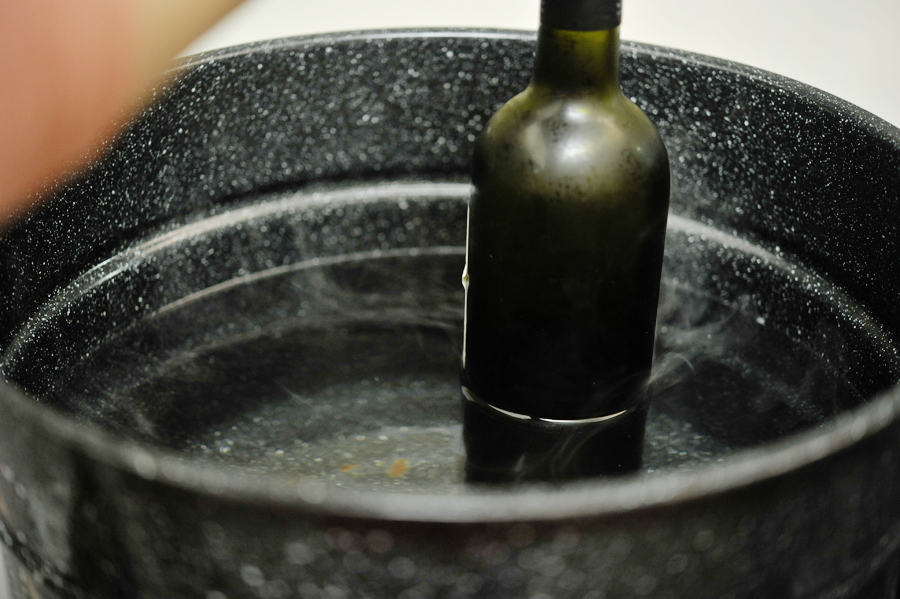
Dunk the bottle for 5 seconds.
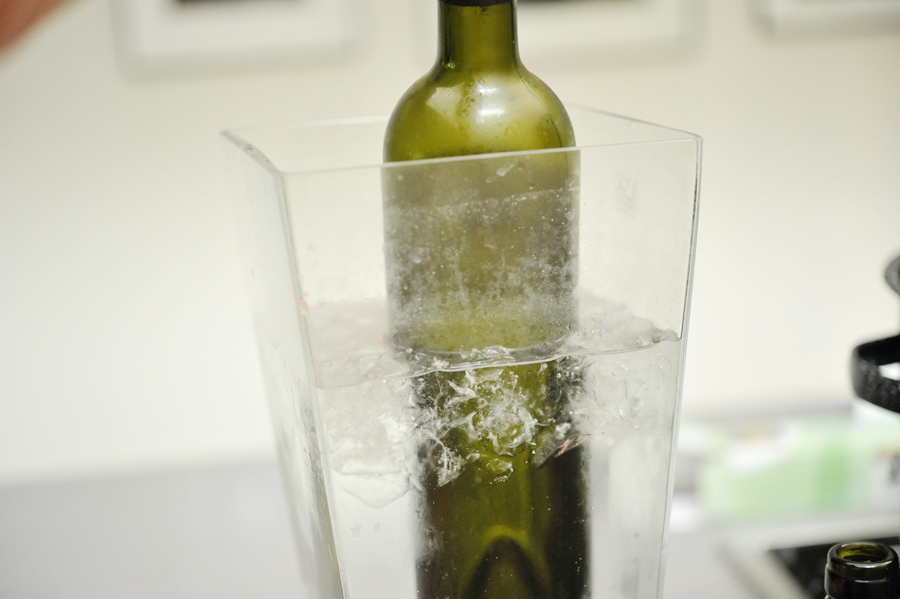
Then remove and dunk into the ice water for about 10 seconds or so.

Some bottle cutters come with a metal stick in case your bottle is resisting and you want to tap the fault line gently.
If you look closely you can see the fault line and where the metal stick is tapping it.
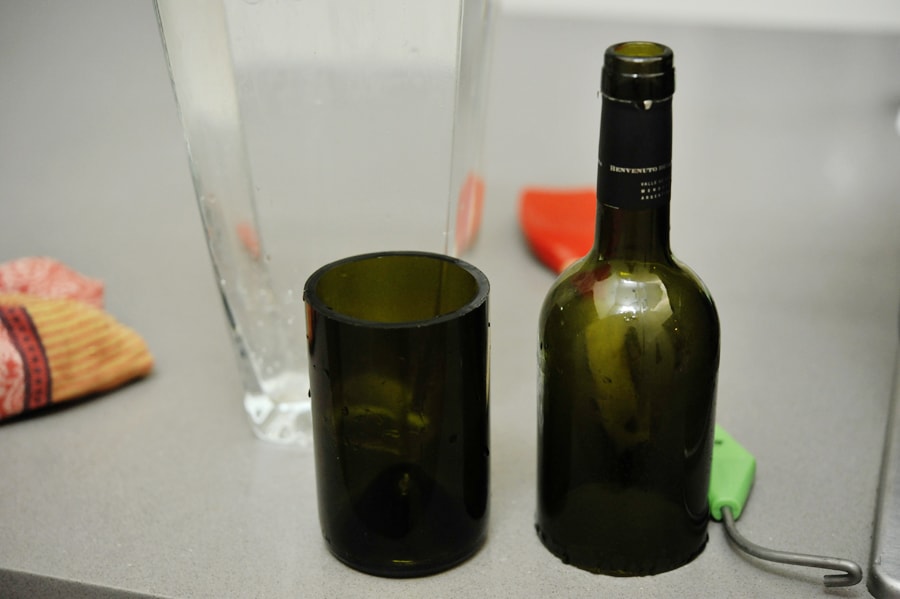
Ideally it will split cleanly in half. The thinner glass bottles work better than the thicker. There are some brands of wine that work perfectly every time. And others that are very difficult. Expect to have some casualties and simply toss them into the recycling and move on. If it is just slightly off in one section you could use a diamond glass cutter or sand it down but it requires some extra effort and expense.
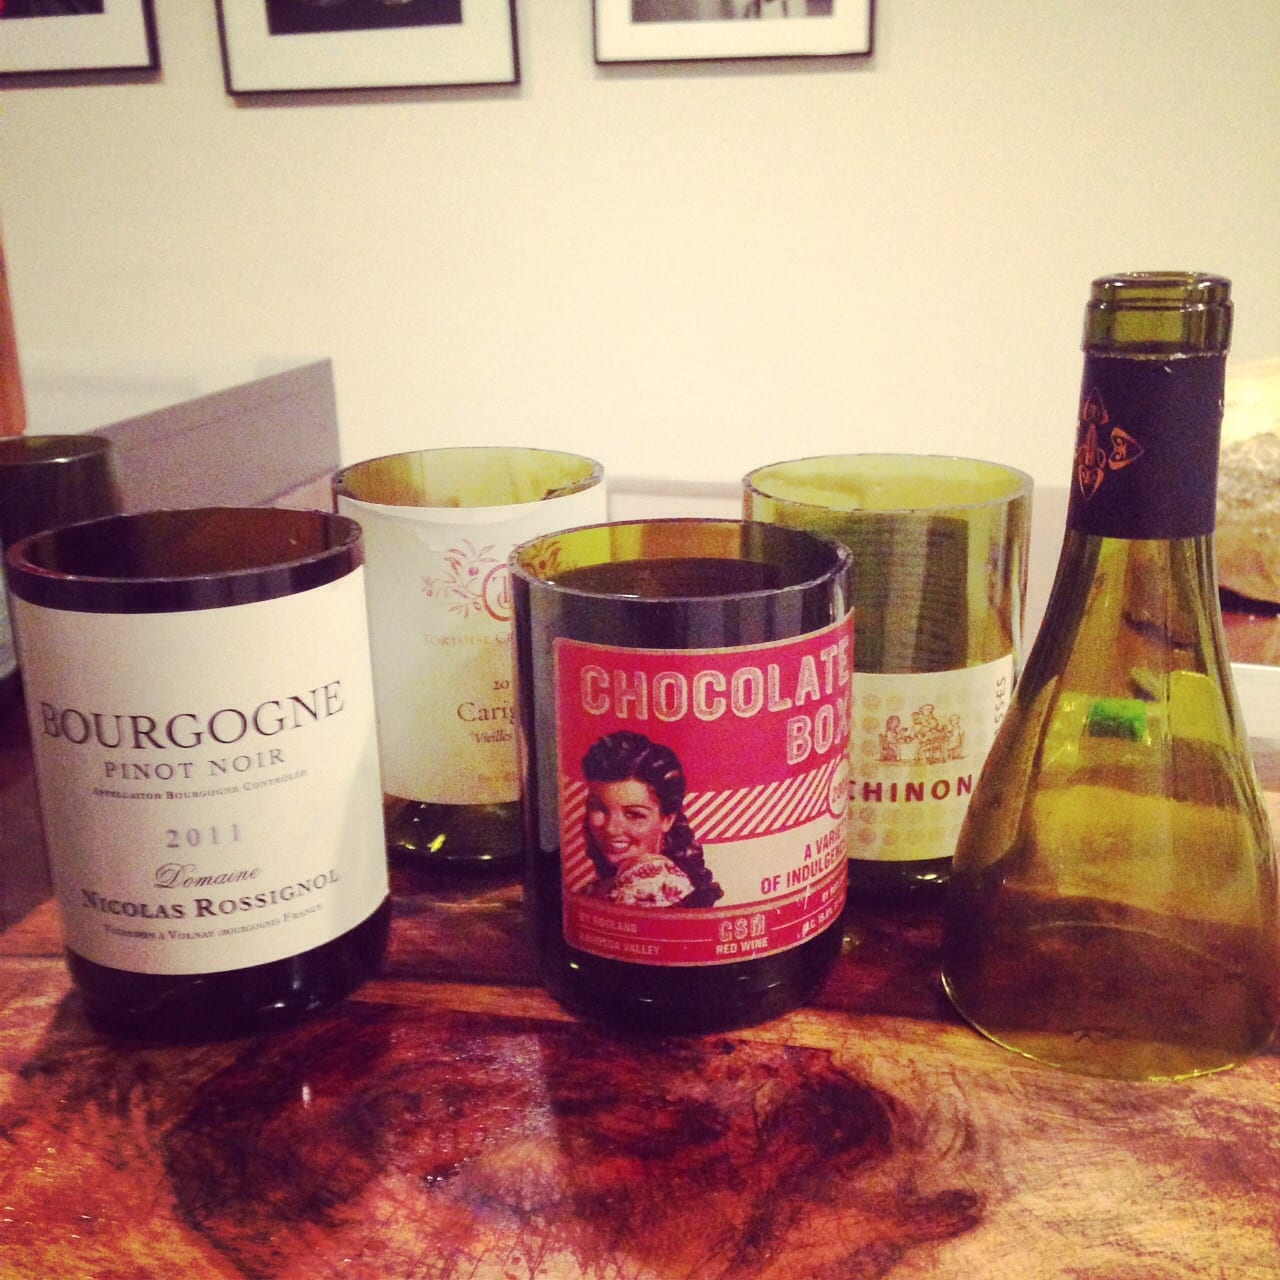
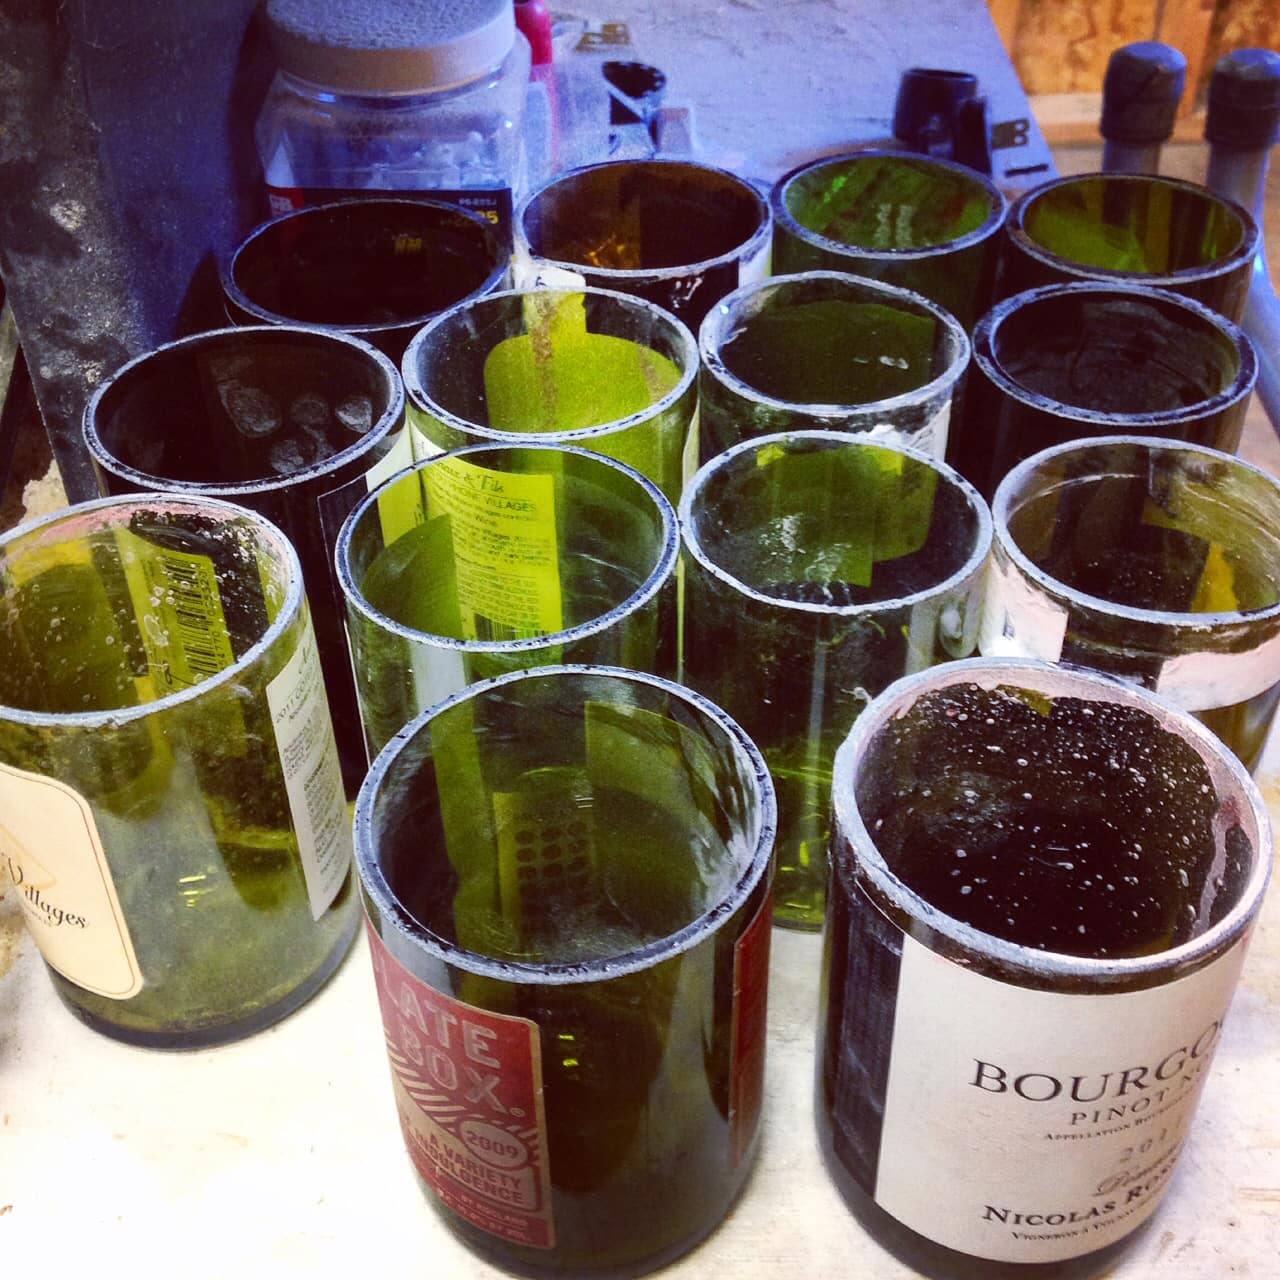
If you are using all kinds of bottles you’ll have a whole variety. Some will be thicker rimmed, some will be wider, some will be thinner rimmed, some will be narrower.

Try to match them so you have complete uniform looking sets. Once again, you’ll note that certain brands fit together consistently in size and thickness.

Then get a band of sweatshop brothers to help you sand! Just kidding. I enlisted my friends who have a workshop with a variety of sanding options because I wanted to see what would work. As you can see one tried gluing sandpaper down and getting it wet and running the lip of the glass along it. Another used a hand sander.
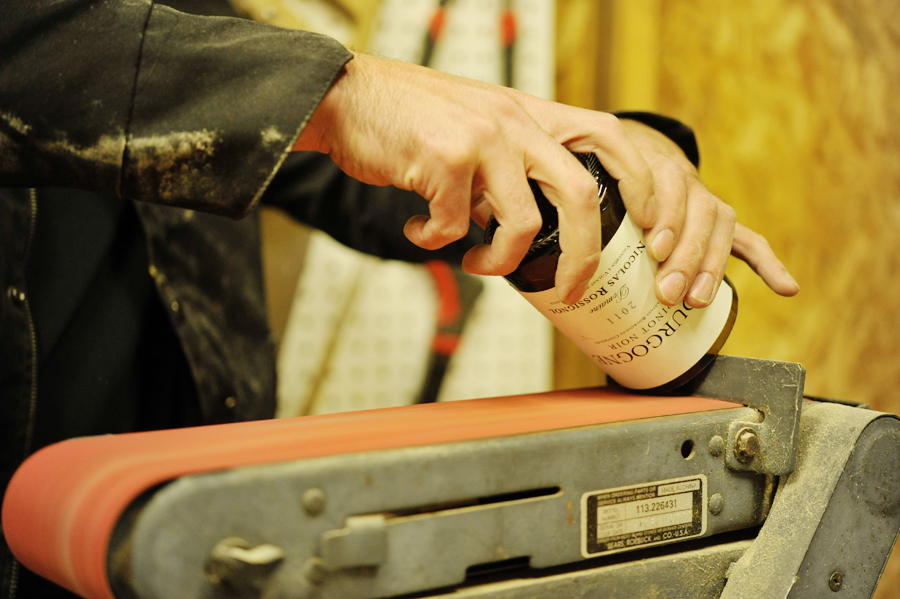
We also tried this belt sander.
And I tried this round sander for the inner edges.
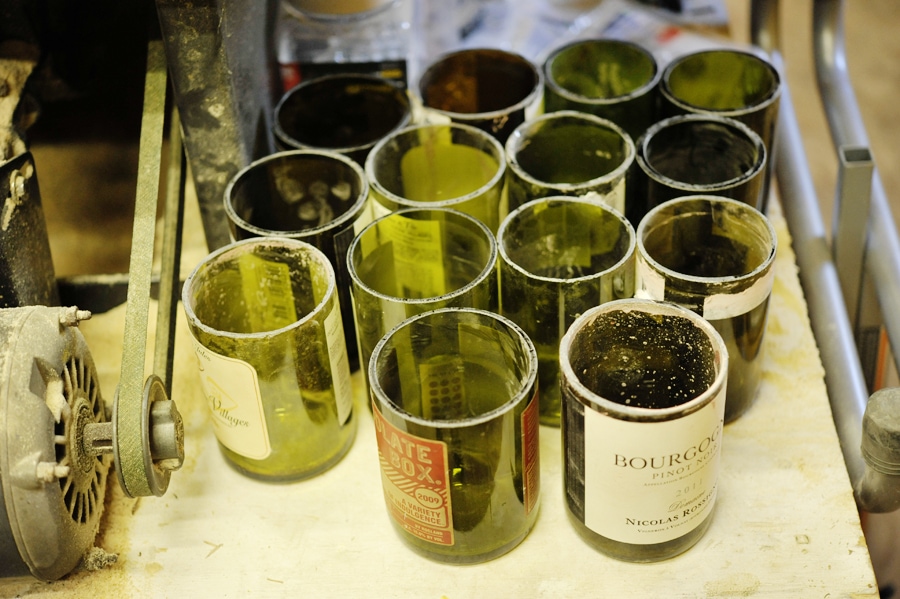
Here is what they looked like when we did that…
Here is a closer look. They weren’t as smooth as I wanted. So you know what worked the best off all?
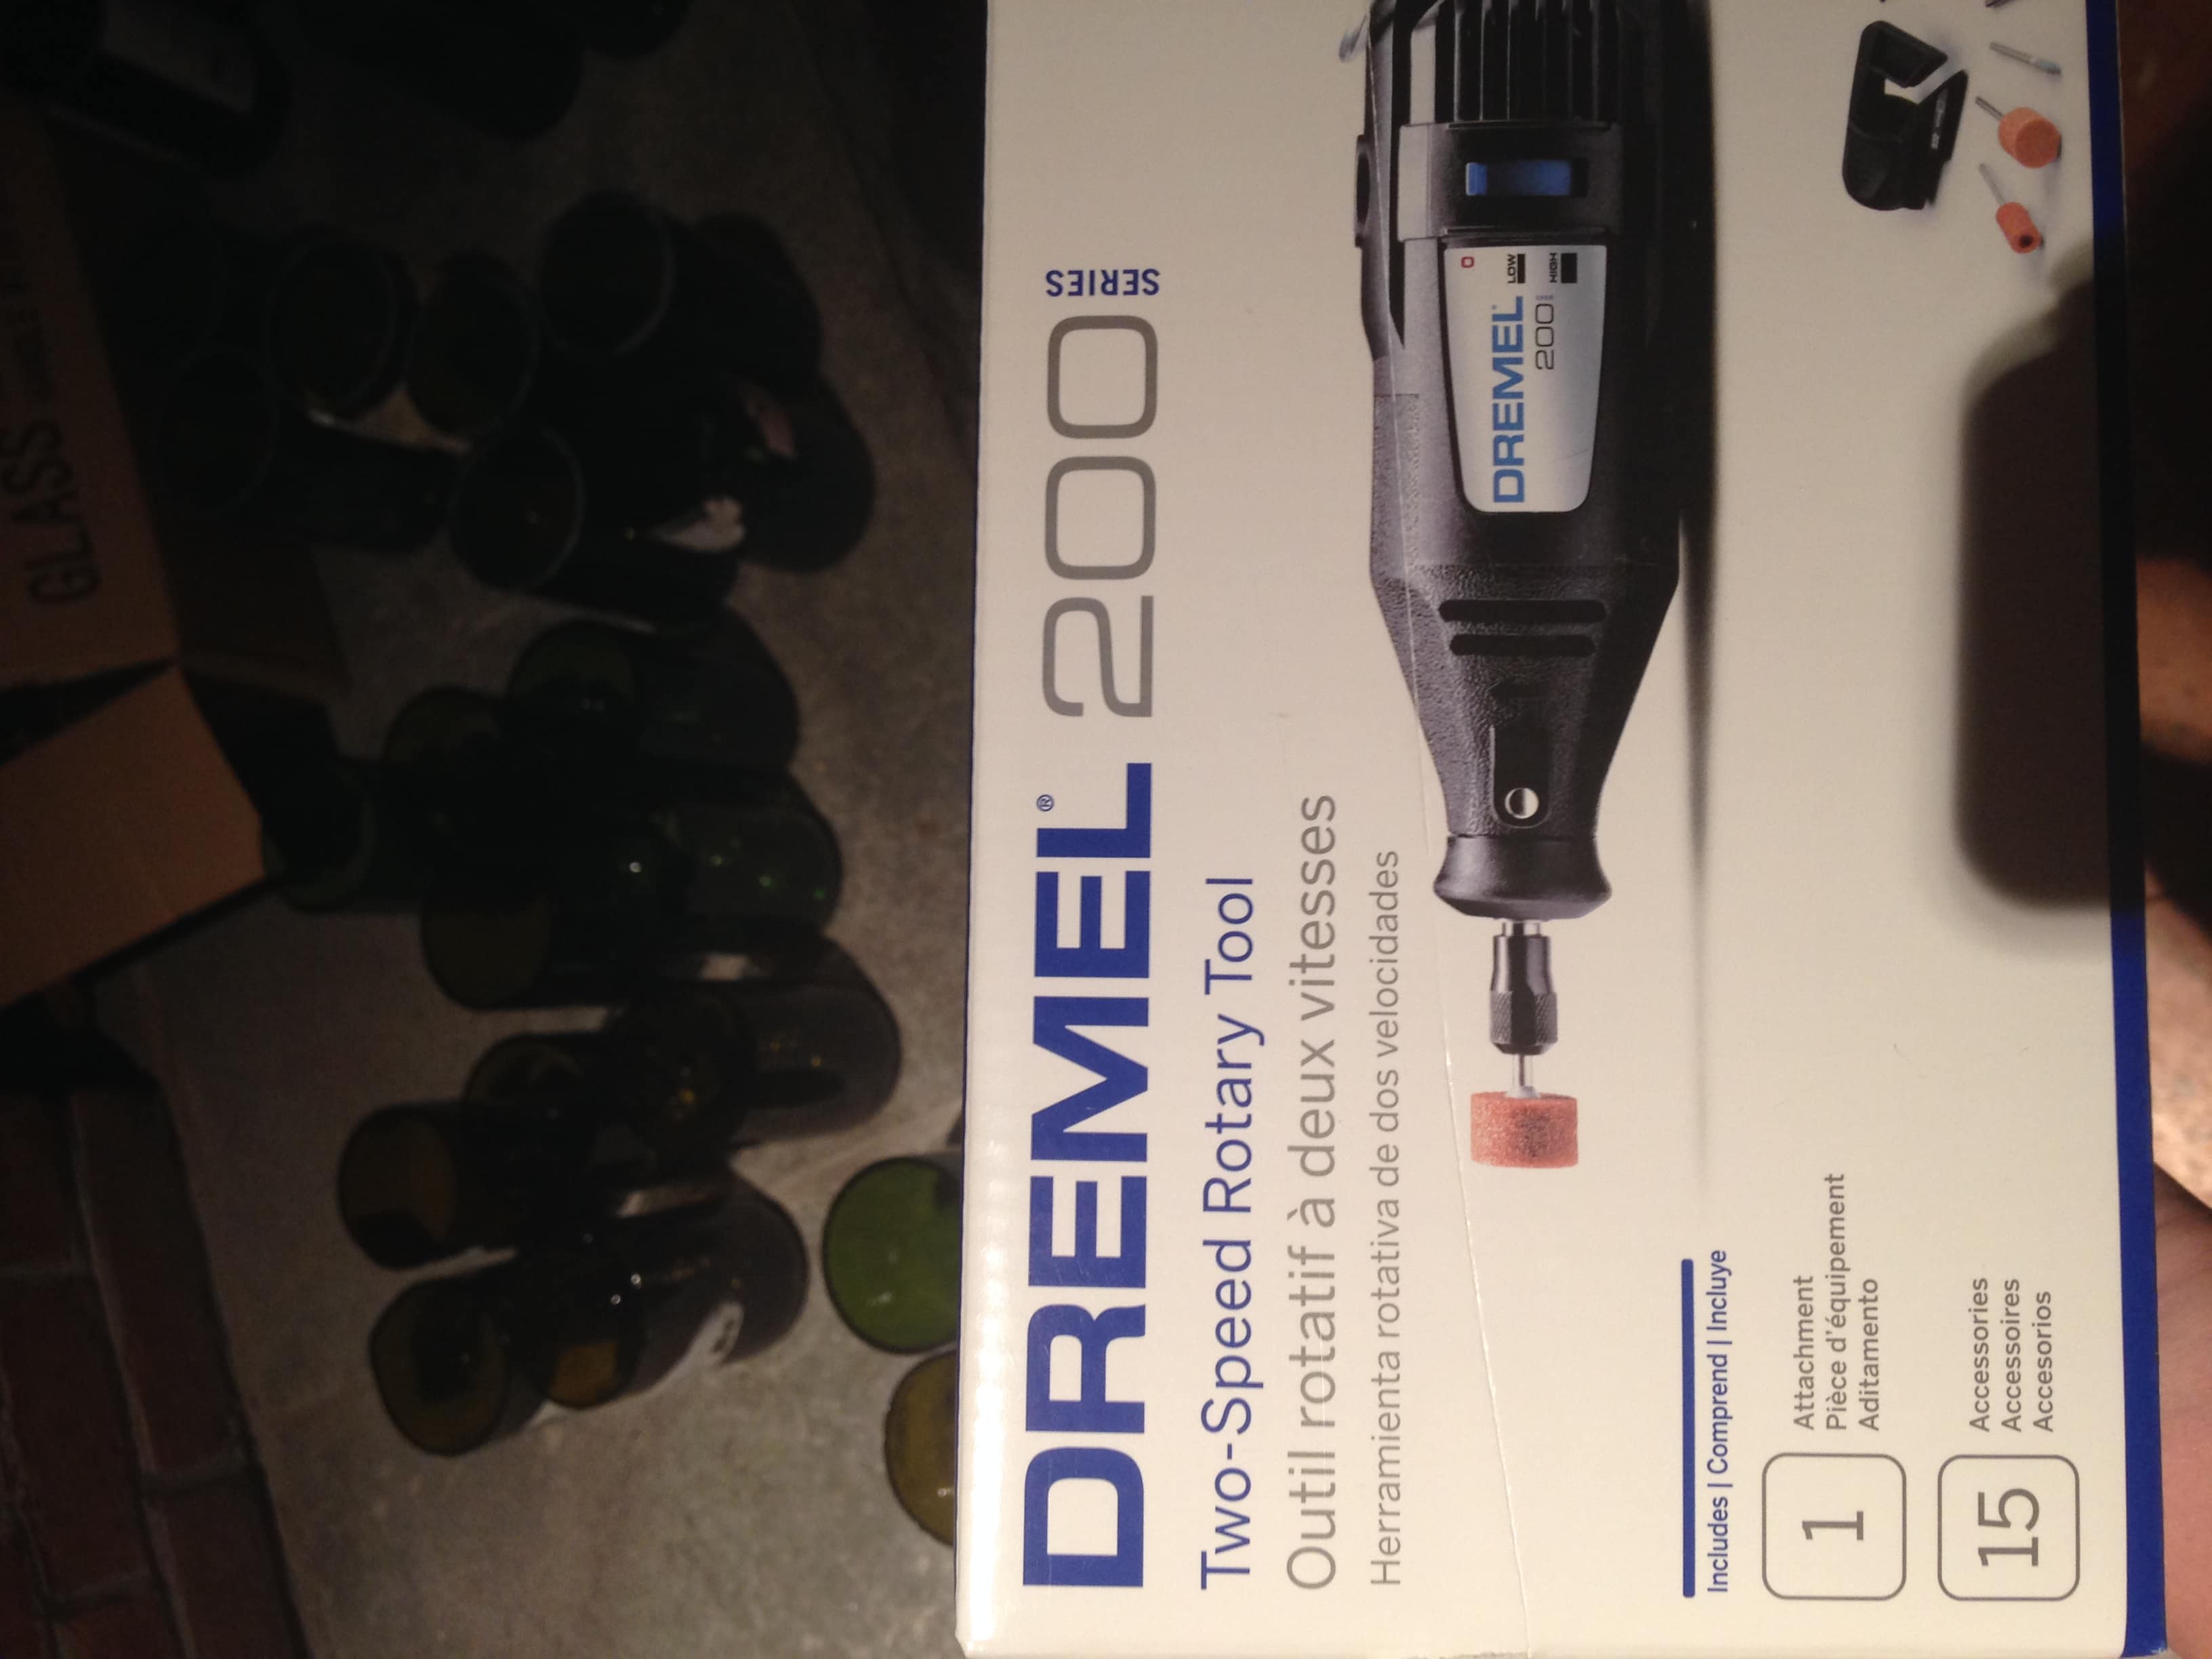
This. I went to the hardware store on a Friday night (because I’m so cool that that’s what I do on Friday nights) and I bought a Dremel tool. It was AWESOME. Use the light cream colored sand attachment (not the darker brown one), for the smoothest edges.

Here they are right before I shipped them off to my manager and agents in L.A. I’m turning them all into Modern Pioneers whether they like it or not.
One tip: The rims will have a white look from the sanding even though they are smooth. I rubbed them with coconut oil but that will wash off in the dishwasher. If any of you geniuses can think of a way to make them look permanently “oiled” leave it in the comments. We discussed torching them with a blow torch but that sounds too extreme to me.
How to Make Glass Bottles into Glassware
Rather than recycle your glass bottles, upcycle them and enjoy them as glassware. Bonus points if you have bottles with screen printing on them rather than a sticker; the former makes for an edgy-looking glass. There will be some casualties in this process, so have extra bottles on hand.
Tall stock pot
Tall vase or other receptacle for ice water
Glass bottles of any size that you would like to drink out of, from wine bottles to beer bottles
Glass bottle cutter
Dremel with sand bit attachment
Paint thinner (optional)
1. Remove the labels from your wine bottles by soaking them in a sink full of water for several hours, up to overnight. Any that don’t come off easily will need to be scraped off and then the glass rubbed with paper towel soaked in paint thinner.
2. Bring a stock pot of water to a boil and turn off the heat.
3. Prepare a tall vase of ice water.
4. Determine the desired height of your glasses and lock in the bottle cutter by tightening the screws so that each glass is the same height. You may find that your wine bottles are different heights in which case you will need to adjust the screws and height against the previous one you have cut to make sure they match.
5. Fit the bottle to the bottle cutter and apply pressure to the blade, rotating the bottle in as few motions as possible so it makes one continuous mark around the glass. Repeat for each bottle you are cutting.
6. Hold a bottle that you’ve already scored and dunk it into hot water for 5 seconds.
7. Remove and repeat in the cold water.
8. Do this one to three times with each temperature of water, and you will hear a crack. The bottle should come apart on its own. If not repeat this several more times.
9. Use a dremel with a sand bit or sandpaper to smooth out the edges of the glass.

18 Comments
Joe Lively
Interesting about the dremel tool. it sounds labor intensive, though. I have been using a belt sander with progressively finer wet or dry grits. wet sanding, Start with 80#. Finish with 200#. After use, the 80# becomes about 150#. The 200# wears down to 400#. Basically, then, one only needs two grits. remember that silica dust is awful stuff if it gets in your lungs. keep face, nose, mouth covered. eyes, too. i wear safety glasses and a handkerchief over nose/mouth when sanding. been drinking from repurposed wine bottles for 45 years.
Ryan
Hi Joe,
Forgive my ignorance, but how do you wet sand with a belt sander? Or is a wet sander an entirely differeNt tool?
Thanks
Murray
Ryan, A wet belt sander is a similar but different tool. It is designed to be water resistant and use special Silicon Carbide wet/dry sanding belts. These sanders usually run around $500 and higher.
Smoothing the edges of a cut bottle can / should be a several step process, depending on how smooth you want the edge to be. The typical process is to use 60 or 80 grit as the 1st step to grind off the sharp edges and bevel them a little. The next step would be to smooth the edges to the next level with 120 or 220 grit. This will give you a nice smooth edge but the edge will still look a bit frosted. The next stage would be to use 400 grit which will make the edges very smooth and slightly frosted. If you really want a polished glass look, you need to go to about 1200 or 2500 grit.
A sanding belt is a good solution for the 1st coarse grind 60 or 80. What I recommend after the belt sander grind, switch to sanding drums which fit into standard drills and come in different sizes and grits. Silicon carbide drums allow you to sand wet so you don’t need to worry about dust collection.
There are other solutions. One you might like to check out is the Saber-tooth solution at bottlecutting.com It’s a set of diamond coated sanding pads – 60 and 400 grit plus 1200 grit paper. it’s pretty affordable and effective.
Cheers, Murray
Some girl
I use a Dremel to polish my edges, but the Gleen-sih-Blue Colored bits (Silicon carbide) and DiamonD coated (or preferably Impregnated) burrs work much better than the tip you reccommend. FUrthermore, if you want EVEN smoother edges you can use the Dremel sanding Sponges (they look like cotton candy but come in colors according to grit) and progressively sand the edge with a finer and finer grit. And if you really want to go crazy and have a lip that perfectly matches the texture and color of the rest of the glass, polish it with Cerium Oxide (the more white in color/the higher in purity the better)
And the cerium oxide can take a LOOONG time if your last round of sanding was with any grit under 2,000-1,500)
I am a perfectionist so I had to find a way to make the edges of the glass PERFECT! Felt compelled to share my now well-test method (albeit in a very abridged form.)
Stan
Ok, some girl, I’ve looked all over and can’T find gleen-sih-blue bits. Please enlighten me.
Please reply to email.
Stan
Kimberly Delgado
Did some girl respond? I think she meant to say the greenish blue bit. lol
Dawn
Thanks for the tips! Can someone please tell me how to find the Dremel sanding sponges? I’ve looked online and can’t find that. Maybe they are CALLED SOMETHING DIFFERENT? tHANKS!
Dawn
Sorry about the caps. Didn’t mean it.
Christina
If I had all the tools and stuff necessary to do this, I’d love to do this… but, I don’t, so I’ll just have to stick to acquiring glasses the old fashioned way – buying them 😉
Kim
Hi Christina!
I do glass bottle cutting on the cheap– takes a little more effort, but does the same job! The cutter is your biggest capital expense, mine was AUD $28 + shipping from an online craft store, but depending where you are you could probably get one cheaper. From there, your next expense will be sandpaper– I spend about a dollar a sheet from my local hardware (even for wet-dry!), so that’s $6 off the bat then about 20-30 glasses later, you’ll need more (I use some grits more or less than others, so you’ll either run out sooner or slower in some grits than others). I use 80, 180, 240, 360, 600, and finally 800 grit for my glasses (my glass scorer even came with a small sheet of 2000 grit!). It’s not as fast as using a machine, but I think it’s kind of relaxing– just rolling a glass back and forward and back and forward for a few minutes per grit. If you use the hot-cold water immersion method, I guess that only costs as much as the water costs you 😉 otherwise, I use the candle-water method, where I heat the score line using a candle ($2 for 100 tealight candles from Ikea), then run it under cold water. Works fine! Sure, $35 seems like a lot of money to spend at first, but given the fact that you get about 20-30 glasses out of that first lot of sandpaper, it’s well worth the investment! only $1-$2 a glass!
Georgia Pellegrini
Great tips Kim!
Jared
Very nice write up!
I came for sanding recommendations and will give a Dremel a try.
One thing I would recommend after you do the initial cut is using silicon carbide (essentially metal shavings) to smooth and flatten your cut. Use a piece of scratch glass with a bit of water and the silicon carbide – then just rub your glass upside down against the other glass grinding down your edge to level and smooth. Then you only have to worry about smoothing/rounding the edge, which is where I was spending a lot of time.
Thanks again!
JILL POLLITT
II bought my husband 2 Corona Beer glasses at a local gifT shop & love them.KIND OF DISQUIETING THAT THE SHAPE & SIZE FITS IN MY HAND SO PERFECTLY. YIKEES! HOW MUCH BEER HAVE I DRUNK OVER THE YEARS?!. but as my dear departed MUM WOULD SAY ” WE CAN GO HOME & MAKE THAT FOR 2 CENTS” SO HAVE TO ATTEMPT IT. LOOKS LIKE FUN.
claire H
Thanks for these fun instructions! Just a question though- I have used the same cutting tool as yours, but i’d say at least half of my bottles break with an uneven edge, one small section on the rim will have a jagged edge like a tooth that can’t be broken off or sanded down. does this make sense? how do you manage to break the glass so evenly or what am i doing wrong?
Georgia Pellegrini
There is not a 100% effectiveness rate, it depends on how clean the cut is and the change between hot and cold water. It also depends on the thickness of the glass, some wine bottles work like a charm while others are too thick or thin. We have used pliers to break off any jagged bits with some success. Make sure you use safety goggles!
janet
I am doing 100 glasses for a wedding. Tried alot of techniques to break the glass after the initial etching with a ephrey bottle cutter which worked great. what i learned was the initial heat of the water was key….i used a kettle of boiling water, turned the bottle about 4 times while pouring the water over it and then used an ice cube to make the break happen. i ran the ice around the first time quickly, paying close attention to where the initial etching may not have been as deep…i tried to connect the less cut spots with the parts that were easily breaking on the line. i found if you had to go back to the hot water, you would likely have a bad break. I am now ready for the sanding the edge and have a dremel 7300 with some sanding tips. sounds like it will work; hope it is not too tedious or will need to get something for my drill, it looks like.
thanks for all the tips on this site. it is the best one i found.
Georgia Pellegrini
Sounds great, you are very brave to do 100 of these! It is a lot of work!
Kaylene
Great post! Could you post a picture of the bit you used? I’m having trouble finding what you’re describing. Thank you!